
john heggan's Store
Owned by john heggan Joined Aug 2023 19 Listings
john heggan's Store
easyid.me/biz/johnheggan-77442c • Verified Store
Scan to open official EasyID digital store, view live catalog, or save business card.
Verified Merchant
EasyID Certified Seller
Fast 24h Packing
Direct courier dispatch
Zero Escrow Direct
Direct merchant settlement
Store Listings (19)
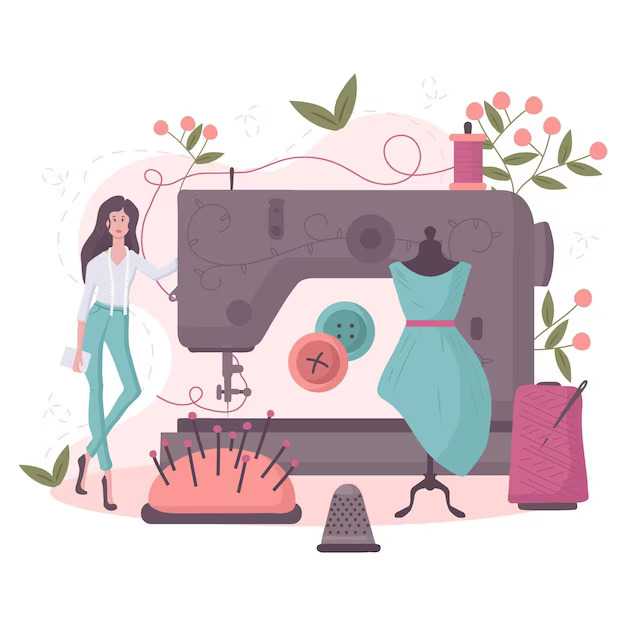
Embroidery Digitizing for Fashion: Elevating Garments with Precision
Embroidery digitizing is the process of transforming artwork into a digital file that embroidery machines can read. It is essential to the fashion design industry because it enables designers to add custom, precise embroidery to clothing, elevating the entire look. Compared to traditional hand embroidery, computerized embroidery offers unmatched stitching precision and detail. <br>Fashion designers can now add detailed, intricate embroidery motifs and lettering to their garments thanks to the digitizing process, which turns artwork such as logos, patterns, and decorations into embroidery designs made up of various stitch types. The digital files are then loaded onto computerized embroidery machines, which interpret the file and stitch out the embroidery onto fabric. <br>Compared to screen printing or other decoration methods, computerized embroidery offers stunning results and lower setup costs. Digitizers can create a smooth, professional look for embroidery on apparel and accessories by carefully controlling the density, direction, and height of each stitch. This precision elevates the visual appeal of garments beyond what could be achieved by hand. <br>Designers can translate their exact creative vision for logos, motifs, and visual elements into embellished designs through digitization, which opens up a world of creative possibilities. By utilizing high-quality, customized embroidery, designers can elevate the visual impact of garments and elevate their brands to new heights. <br>Evolution and History: <br>While decorative hand embroidery was a complex and time-consuming process, the sewing machine's invention in the 1800s helped automate and speed up embroidery production. Examples of hand embroidery can be found dating back thousands of years, to ancient China, India, and the Middle East. <br>Punch cards that programmed stitch placement drove the development of computerized embroidery machines in the late 20th century. Shortly after, specialized digitizing software became available, enabling designers to design embroidery patterns on a computer screen that an automated embroidery machine could then transfer and sew onto fabric. <br>The first digitizing software translated vector or raster images into stitch files; as time went on, it added features like stitch editing, colour palette creation, sequencing, and simulation to see the design before embroidering. This revolution in digitizing allowed for more intricate and imaginative embroidery designs, quicker turnaround times, and greater accessibility to digital embroidery for small businesses and home stitchers. <br>Today's digitizing software is still evolving and improving; it can handle various special stitch types, manipulate individual stitches for the best results, and produce files that work with industrial embroidery machines. This digitizing process takes computerized embroidery's precision and capabilities to a whole new level. <br>Digitization Procedure: <br>The primary processes in the digitization process are as follows: designs are converted into digital embroidery files so that embroidery machines can create the patterns on fabric. <br>Scanning the Fabric/Materials: <br>The embroidered fabric must first be scanned to ascertain its texture, density, stretch, and other properties. This helps to establish how the stitches will sit on the material and records the subtleties of the cloth's weave and nap. <br>Vectorizing the Image: <br>The design is transformed into a vector graphic, which is made scalable, easy to work with, and clean. Vector files are perfect for embroidery because they allow enlarging designs without sacrificing image quality. Vector graphics are created using mathematical formulas to draw lines and shapes. <br> <br>Colour Separation: <br>Careful colour assignment enables a smooth embroidery run. Complex designs may have up to 10 or more colours. Embroidery files are color-coded so the machine understands when to switch threads. The vector file needs to be separated into different colours. <br>Converting to Stitch Files: <br>Stitch types, orders, and directions are specified when the vector image is converted by digitizers into an embroidery machine-readable stitch file (such as a.DST file), with the density and length of the stitches calibrated for certain design elements and fabric kinds. <br>Selecting Stitch Types: <br>The digitizer chooses the best stitch types based on various design features and fabric; common stitches such as satin and fill stitches are combined for maximum coverage and texture; the stitch types can be adjusted and modified as necessary during the conversion process. <br>Stitches Types <br>Digital embroidery for fashion uses a few major types of embroidery stitches, each with a specific function and the ability to produce distinctive details, textures, and effects on clothing. <br>Stitching in a Run <br>One of the simplest and most versatile stitch types is the running stitch, which is made up of a series of small, even stitches that create a dashed line. You can embroider lettering, delicate vines, stems, and other fine details with running stitches, which are excellent for outlining shapes and adding lightweight details. <br>Satin Stitch <br>Satin stitches are especially good for embroidering larger, filled-in shapes and letters because they produce a velvety, sumptuous look. Satin stitches are tightly packed zigzag threads that completely cover an area. The smooth, shiny appearance recalls satin fabric. <br>Complete the Stitches <br>As the name implies, fill stitches are used to add texture and visual appeal to an embroidered area. Common fill stitches include the pattern fill, motif fill, cross-stitch, and stippling stitch. Fill stitches are used to embroider filled shapes, backdrops, and large expanses. <br>Unique Stitches <br>The candle wicking stitch, Kensington outline stitch, fern stitch, couching stitch, and other specialty stitches are less frequent but highly effective embroidery stitches that provide unique stitched effects such as fur, grass, feathers, chains, braids, and dimensional embellishment. <br>Fashion Design Benefits <br>Fashion designers and clothing manufacturers benefit greatly from embroidery digitizing because it enables a level of consistency and precision that is not possible with traditional hand embroidery techniques. Using digitizing software, designers can convert even the most complicated and intricate embroidery patterns into digital stitch files, which tell the embroidery machines how precisely to reproduce the designs on fabric. <br>With the speed and accuracy of embroidery machines, the most intricate designs can be scaled up for mass production without sacrificing quality. Curves, gradients, and the smallest details can all be translated into stitches to create stunning embroidered embellishments. Digitizing allows embroidery designs to be infinitely complex without sacrificing precision. <br>In addition, designs can be quickly edited and refined on screen before stitching, and embroidery machines work quickly to apply decoration that would take hours or days by hand. This speeds up production timelines and gives designers more creative freedom. Digitized embroidery is also significantly faster than traditional punch card embroidery machines or hand embroidery. <br>In summary, digitizing outperforms hand embroidery in terms of cost-effectiveness. Machine embroidery that has been digitally digitized can produce garments with the same level of quality at a much lower cost than hand embroidery because it replaces labour-intensive manual labour with automation, making mass production of embroidered apparel economically feasible. <br>Fashion designers who want to push boundaries of embellishment and creativity while scaling production without sacrificing design integrity will find digitizing to be of immeasurable help due to its accuracy, complexity, speed, and cost-benefits. <br>Raising Clothes <br>Fashion designers have the creative flexibility to create clothing that never looked better thanks to digital embroidery. Customization, fine details, a wide range of fabrics, and an upscale aesthetic are all made possible by the accuracy and versatility of digitizing. <br>Personalization and Customization <br>Fashion brands can use digital embroidery to create one-of-a-kind pieces or give customers complete customization options with initials, names, and custom motifs. Even fast fashion brands have used digital embroidery to provide simple customization to customers, allowing them to add their name or phrase to garments, adding a personalized touch that makes the pieces feel unique and tailored. This is one of the biggest advantages of digital embroidery for fashion. <br>Extensive Details <br>With the aid of digitizing and specialized embroidery machines, intricate designs can be stitched with flawless accuracy and consistency, transforming ordinary clothing into high-end couture with luxurious aesthetic elements. You can add delicate floral motifs, geometric patterns, lace effects, and other embellishments as accents to your entire design or use them sparingly to draw attention. <br>Variability of Fabric <br>Thanks to its accuracy, digital embroidery can be applied to a wide variety of fabrics, weights, and textures, including silks, chiffon, canvas, and denim. Fashion designers use digitizing to bring their ideas to life on various materials, even when working with structured fabrics. Novelty threads, such as glow-in-the-dark and specialty metallic, can also be used to add distinctive accents. <br>Elegant, Premium Style <br>Fashion labels such as Ralph Lauren, Gucci, and Dolce & Gabbana employ computerized embroidery to imbue clothing and accessories with that elusive element of luxury, turning them into high-end statement pieces. The refined digital designs that are incorporated into the silhouette and construction impart an immediate sense of luxury, elevating embroidery from an accent to a key component of the design. <br>Current Patterns <br>The fashion industry is continually changing, and embroidery follows suit. Some of the most recent developments in digital embroidery for fashion include: <br>Patterns of Placement <br>Designers are getting creative with placement, using embroidery selectively in places like shoulders, backs, sleeves, or hemlines. This allows the embroidery to stand out and make a statement. Bold patterns and visual interest are being created by strategically placing embroidery. <br>Dimensional Appearances <br>Fashion designers are utilizing digital embroidery's prowess at dimension to create unique textures, forms, and visual effects on clothing. By layering stitches and experimenting with depth, embroidery may almost appear three-dimensional. <br>Combining Digital and Hand <br>Another trend that blends the precision of digital with the individuality of hand craftsmanship is the combining of digital and hand stitching. Some designers are even including hand stitched highlights, beads, sequins, or other embellishments on digitally embroidered textiles. <br>Illustrations on Paper <br>The ability to convert graphics and illustrations into embroidery designs is made possible by digitizing software, which has resulted in the use of digitalized graphic prints and art embroidered onto clothing. From bold and modern illustrations to modern prints, embroidery is being used to add texture and dimension to prints and artwork. <br>Sustainability <br>Compared to traditional embroidery techniques, digital embroidery is more environmentally friendly. Errors during the production process are minimized because the embroidery design is digital, and editing a design is much easier in computer software than it is in a full embroidered sample. <br>In addition, digitising a design makes it possible for the files to be preserved and utilised again whenever necessary. Unlike traditional embroidery, which necessitates producing the pattern from scratch every time, digital files enable the design to be easily retrieved and sent for production with no effort. <br>Moreover, digital embroidery machines take less water and electricity to produce due to their higher efficiency when stitching out designs compared to traditional hand guided machines. The accuracy of digital machines also reduces waste and faults. <br> <br>In general, digitizing embroidery improves productivity and simplifies the design process, which makes digital embroidery more environmentally friendly and sustainable than traditional stitching techniques. Digitizing embroidery also lessens the environmental effect of embellishing clothing. <br>Difficulties <br>Although the field of digital embroidery is fascinating, designers should be aware of the following difficulties: <br>Steep learning curve <br>Learning how to use embroidery digitizing software involves patience, practice, and time. There are a lot of tools and functions to master. - Creating high-quality embroidered files demands both technical know-how and artistic vision. <br>Cost of machinery and software <br>Digital embroidery can be out of reach for smaller design houses and start-ups due to the high cost of both the machinery and software used for commercial embroidery digitizing. Popular options like Wilcom can run into the thousands of dollars. <br>File compatibility issues <br>Not all embroidery machines and digitizing software work well together. Designers need to do their research to make sure files transfer and stitch out correctly. - Quality is frequently lost while converting file formats. <br> <br>Limitations of digitization <br>Digitizers must work within the limitations of available stitch types and fabrics. Technical limitations can sometimes stifle creativity. Although digital embroidery offers up incredible creative possibilities, some looks remain challenging to achieve. Dense, realistic imagery does not always digitize well. <br>For fashion designers who master digitizing software, the payoff is taking their garments to the next level with precision embroidery full of depth, dimension, and visual impact. The future possibilities make overcoming these challenges worthwhile. The world of digital embroidery involves a steep learning curve, financial investment, and technical limitations. <br>Digital Embroidery's Future <br>With its continued development and spread throughout the fashion industry, digital embroidery appears to have a bright future. Here are some major trends to keep an eye on: <br>Growing Adoption and Innovation <br>As technology develops, digital embroidery systems get more complex while remaining user-friendly. Their precision and capabilities increase as costs decrease, which encourages more manufacturers and designers to use digital embroidery for their collections. We can anticipate continued innovation that makes digitization more affordable. <br>Integration with 3D Technology <br>With the help of contemporary CAD software, designers can produce 3D models of clothing and then convert those to embroidery patterns. This process of fusing 3D and digitizing speeds up the design process and allows for greater experimentation with density, placement, and effects. In the future, 3D visualization will be an essential part of digitizing and will facilitate even more customization. <br>More Accessible Technology <br>While high-end professional equipment continues to be pricey, entry-level digitizing software and embroidery machines are becoming more affordable. Home crafters can convert digital files into stitched designs with ease thanks to simple design apps. This democratization will allow digital embroidery to become more widely used outside of the fashion industry. <br>Expansion to Accessories, Shoes, etc. <br>Although digitizing is currently primarily utilized for apparel embroidery, the techniques are also applicable to leather goods, footwear, hats, and other items. As brands realize the potential of digital embroidery to set their products apart, we anticipate seeing more accessories and shoes with unique digitized details. <br>As technology advances, fashion brands have an exciting opportunity to experiment and find new ways to integrate fashion embroidery into their collections. By embracing digitization, fashion embroidery can overcome historical limitations and unlock new creative possibilities for embellishing garments and other products

Embroidery Digitizing Trends: What's In and What's Out
The global embroidery digitizing market was valued at $412 million in 2021 and is projected to reach $782 million by 2028, growing at a CAGR of 9.6% from 2022 to 2028. Embroidery digitizing is a rapidly evolving industry with no signs of slowing down. But exactly what trends are shaping the future of embroidery? In this post, we'll explore the top embroidery digitizing trends that are in high demand right now, as well as a few outdated trends that are on their way out. Understanding these significant developments will help digitizers, embroiderers, and customers stay up to date. <br> <br> <br> <br>Continue reading to learn about current and upcoming trends in embroidery digitizing! <br> <br> <br> <br> <br> <br>First trend: the desire for quicker turnaround times <br> <br> <br> <br>Customers want embroidered orders to be completed faster than ever before in today's fast-paced world. The rise of online shopping and on-demand delivery services has conditioned customers to expect speedy turnarounds, even for bespoke orders. <br> <br> <br> <br>Customers who are used to Amazon Prime shipping have little patience for long lead times on their embroidered hats, polos, or blankets. Social media adds fuel to the fire, with customers demanding rush service after seeing photos of friends receiving embroidered goods overnight. As a result, embroidery shops are under increasing pressure to deliver orders within days instead of weeks. <br> <br> <br> <br>Digitizers and embroiderers have to streamline every step of the process to meet demand. Speed-optimized shops are beating the competition and satisfying customers who associate quick turnaround with high-quality service by investing in state-of-the-art machinery, implementing lean production workflows, pre-programming common designs, and avoiding errors that lead to delays. <br> <br> <br> <br>Customers now expect most embroidery orders to be completed in 3-5 business days, even with multiple pieces, customizations, and revisions. Next-day or 2-day service is becoming the standard for simple designs. Companies that don't adapt risk losing business to those who embrace the need for speed. <br> <br> <br> <br>Trend #2: Enhanced Embroidery Quality <br> <br> <br> <br>Thanks to developments in embroidery digitizing software and embroidery machines, customers may now request embroidery that is of higher quality, with finer details, crisper image replication, and more complicated designs than ever before. <br> <br> <br> <br>stitching is progressing beyond simple logo and name stitching into complex artwork, portraits, landscapes, and graphical designs. This means embroidered patterns can feature subtle color gradients, rich textures, photorealistic imagery, and a broader range of colors. <br> <br> <br> <br>Embroidery file digitizing companies aim to satisfy their customers by providing increasingly intricate and detailed designs. They achieve this by employing sophisticated underlay techniques, meticulous stitch direction planning, and the best possible design densities, which enable them to produce high-quality embroidery that closely resembles printed artwork. <br> <br> <br> <br>Specifically, apparel brands prefer to digitize their designs and logos for high-quality reproduction over screenprinting. Customers find embroidery to have a more upscale and luxurious feel, and even seemingly insignificant details like crisp text embroidery and well-defined graphic outlines have a significant impact. <br> <br> <br> <br>Gallery-quality embroidery digitization will continue to be in demand as interior designers and retailers use more elaborate and artistic needlework in home décor products including pillows, wall hangings, furniture, and accessories. <br> <br> <br> <br>Trend #3: Increasingly Lifelike Embroidery <br> <br> <br> <br>Techniques like puff embroidery and 3D embroidery are rising in popularity as embroidery moves beyond flat two-dimensional motifs to more realistic, dimensional compositions that make designs leap off the fabric. <br> <br> <br> <br>Puff embroidery works well for accents like flower petals, berries, leaves, dimensional lettering, and more. It creates a raised, puffy effect by stitching extra threads underneath the top thread. The bottom threads gather and 'puff' as the top thread is pulled tight. This adds texture and dimension that makes designs feel more tactile and real. <br> <br> <br> <br>The eye-catching qualities of 3D embroidery are applied to lapels, badges, team logos, and branded products. Embroiderers can create designs that stand out and appear three-dimensional by using specialized multi-head embroidery machines, which can stitch a design from multiple angles with precise placement to build up depth and shadow effects. This mimics shapes in real life. <br> <br> <br> <br>Digitizers are also getting inventive when it comes to underlay stitches: dimensional foam or felt can be layered under cloth before stitching for stability and loft, or the fabric can be strategically shaped before the main pattern is applied to help designs keep their form better. <br> <br> <br> <br>This style expands embroidery beyond flat decals on cloth, drawing customers in with the spectacular, tactile designs achievable with puff embroidery, 3D effects, and curved fabric underlay. Overall, more realistic embroidery maximizes the potential of the craft. <br> <br> <br> <br>Trend #4: Personalized & Handmade Designs <br> <br> <br> <br>Mass-produced designs are becoming less and less popular, while bespoke and customized embroidery is in great demand as clients look for designs that reflect their style, interests, and personalities. <br> <br> <br> <br>Custom digitizing services have become more popular as a result of customers' desire for embroidery that feels unique, creative, and made just for them. Using cutting-edge digitizing software, embroiderers can take a client's idea or artwork and convert it into a sew-ready file. <br> <br> <br> <br>Customers can use custom digitizing to add names, initials, logos, phrases, inside jokes, portraits, signatures, and any other creative ideas they have. The finished product feels as though it was made just for that person. Custom digitizing allows for complete personalization down to thread colors, stitch types, placement, and more. <br> <br> <br> <br>Customers may now add their personal touch to hats, purses, clothing, and other items by using customization services instead of pre-set embroidery, which even garment brands and companies are moving away from. <br> <br> <br> <br>Customers want designs that make them stand out rather than blend in, and embroiderers can deliver specialized creations, particularly for them using custom digitizing. The desire for distinctive and personalized embroidery will only grow. <br> <br> <br> <br>Trend #5: Custom Embroidery for Marketing Products <br> <br> <br> <br>Adding branding and personalized designs to a wide range of promotional products—from polo shirts to hats to bags and more—embossing has grown in popularity as a means for businesses to present their brands in a refined, upscale manner. <br> <br> <br> <br>There are a few main reasons why embroidery is becoming more popular for promotional items: first, it offers an imprint that is strong and persistent compared to screen printing or transfers; second, the stitched quality of embroidery adds texture and depth, which makes logos and designs stand out on the product in an eye-catching way. <br> <br> <br> <br>Second, the process is now much faster, more affordable, and more accessible than it was a few years ago. Digitizing software makes it easy to turn artwork and vector files into designs that are ready for embroidery, and computer-controlled embroidery machines can stitch designs precisely and quickly onto a variety of products and materials. <br> <br> <br> <br>Finally, embroidered promotional products are a great fit for businesses looking to project an elegant, upmarket image. Adding embroidered logos or custom designs gives plain products a higher perceived value, which increases the desire for and likelihood of branded merchandise being thrown away. <br> <br> <br> <br>Look for an increase in the use of embroidery on promotional items as consumers' expectations for customization and personalization continue to drive this trend. Astute businesses will capitalize on the adaptability and upscale appearance of embroidery to create memorable branding. <br> <br> <br> <br>Trend #6: Wearable Technology Embroidery <br> <br> <br> <br>With the popularity of smartwatches, fitness trackers, and other wearable technology growing, embroidery is becoming a key component of wearable tech design. <br> <br> <br> <br>Conductive embroidery using stainless steel thread and conductive yarns allows seamless integration of sensors, circuits, and other tech components into fabric, offering a creative, fashionable solution for wearable technology. Stretchable, flexible conductive threads are necessary for clothing and accessories embedded with technology. <br> <br> <br> <br>The metallic sheen of steel thread embroidery delivers a sleek, futuristic look well-suited for smart clothing. Companies like Google, Levi's, Ralph Lauren, and Levi's have experimented with conductive embroidered touchpads, gesture control sensors, and haptic feedback to create high-tech fashion that is both functional and aesthetically pleasing. <br> <br> <br> <br>In addition to the conductive thread, some brands use smooth satin stitch embroidery to cover up electronic components such as circuit boards, LED lights, and tiny batteries. This technique neatly conceals bulky parts for a streamlined appearance and allows complete electronics to be integrated into clothing and accessories like hats, shoes, and handbags. <br> <br> <br> <br>Embroidery has exciting potential to enhance smart clothing with subtle, artistic flair; moreover, as technology advances, embroidery digitizing will need to evolve to support innovative wearable tech applications. A flawless blend of fashion and function requires more precise positioning, tighter stitch regulation, and fine details. <br> <br> <br> <br>Trend #7: Embroidery as a Home Decor <br> <br> <br> <br>Home decorators are turning to embroidery for several main reasons, and the usage of needlework to embellish and improve home furniture like pillows, blankets, lampshades, and more is growing. <br> <br> <br> <br>Compared to screened or printed images, machine-embroidered designs are notable for their detail and dimension, offering a personalized, handmade appearance. <br> <br> <br> <br>Names, slogans, and images can be sewn in, giving each home decoration a personalized touch. <br> <br> <br> <br>Embroidery has a tactile quality that is intrinsic, unlike flat prints, and the textures and stitches offer visual appeal. <br> <br> <br> <br>Stitched embroidery is resilient to frequent usage and washing. It is long-lasting. <br> <br> <br> <br>Stitch artwork can be created using any image or text, thus the possibilities for design are endless. <br> <br> <br> <br>As a simple method to add embroidery to home décor, embroidered blankets and pillows are particularly popular. Personalized blankets and pillows with names, slogans, or family photos make for thoughtful gifts. Embroidered lampshades provide a subtle decorative accent to any space. <br> <br> <br> <br>The handcrafted, artisanal look combined with custom designs will drive embroidery's popularity for home décor. Interior designers are also using embroidery more and more to embellish curtains, quilts, tapestries, and upholstered furniture. As embroidery machines and digitizing software improve, we'll continue to see more innovations in embroidered home furnishings. <br> <br> <br> <br>Trend #8: Embroidery that is More Accessible <br> <br> <br> <br>However, in recent years, needlework has become much more accessible to people of various backgrounds and skill levels. Here are some of the main elements behind this exciting trend: Traditionally, the world of embroidery was seen as difficult and out of reach for many people. <br> <br> <br> <br>Reasonably priced home embroidery machines - The cost of home and hobby embroidery machines has drastically decreased, with some very capable models now available for under $500. This eliminates the need for people to outsource their work to commercial embroidery shops and allows them to establish their own embroidery business at home. <br> <br> <br> <br>Easier digitizing software: Digitizing software is the program that turns artwork into embroidery files. It used to be very expensive and complicated to use, but these days, it's very inexpensive and easy to use, allowing anyone to make their own embroidery designs. Some of the programs are even free. <br> <br> <br> <br>Online training resources: The abundance of embroidery training available today, from YouTube videos to online courses, makes the learning curve considerably less intimidating for both novices and specialists. Both can access tutorials and inspiration whenever they need it. <br> <br> <br> <br>Easily accessible embroidery supplies - Another obstacle to entry for needlework projects at home has been eliminated with the ease with which stabilizers, hoops, embroidery thread, and other supplies can now be bought online or from craft stores. <br> <br> <br> <br>Custom design services: If you're not skilled enough or don't have enough time to digitize your designs, there are plenty of local and online custom digitizing services that can help you turn your idea into an embroidered file. These services are especially useful for first-time embroiderers. <br> <br> <br> <br>Embroidery communities: Vibrant embroidery communities on social media sites such as Facebook, Instagram, Reddit, and others give aspiring embroiderers a place to share their work, receive critiques, and work together. This gives them motivation and support. <br> <br> <br> <br>In conclusion, embroidery can now be done from home by anyone with little initial investment. There are plenty of online and offline resources available. This is a great opportunity to express your creativity through a time-honored craft! <br> <br> <br> <br>In summary <br> <br>Faster turnaround times, more detailed and higher-quality embroidery, unique custom designs, embroidery applications in wearable technology and promotional products, accessibility through at-home embroidery machines, and inventive uses in home decor are some of the notable trends currently shaping the embroidery digitizing industry. The field of embroidery digitizing is always changing due to advancements in technology and shifting customer needs. <br> <br> <br> <br>Customers expect a quick turnaround, sometimes even same-day or next-day service, on their digitizing projects. They also want impeccable quality embroidery that looks like a real piece of art, which is made possible by advancements in machinery and software. As digitizing technology advances, embroiderers can produce highly detailed and realistic designs much faster than ever before. <br> <br> <br> <br>Personalized and creative designs are also becoming more and more popular as people and companies seek one-of-a-kind embroidered items. Embroiderers can be asked to digitize a business's motto or logo, a pet's silhouette, a kid's drawing brought to life, or a variety of unique ideas. <br> <br> <br> <br>Smart marketers use embroidery to brand giveaway items or apparel gifts. Fashion and technology are merging through embroidered wearable devices, sensors, and more. Embroidered pillows, wall hangings, and accents add artisanal flair to home decor. Embroidered hats and jackets are not the only items that benefit from embroidery. <br> <br> <br> <br>Increasingly affordable and sophisticated home embroidery machines enable the general population to digitize and manufacture their designs with ease, enabling embroidery to flourish on a personal and professional level. <br> <br> <br> <br>In conclusion, as long as professional digitizers are paired with state-of-the-art equipment, the possibilities are unlimited when it comes to embroidery digitizing. This process will continue to innovate to suit client needs for speed, quality, customization, and creativity across promotional products, fashion, technology, and home decor. <br> <br>[a]https%3A%2F%2Fwww.digitize4life.com[/a]
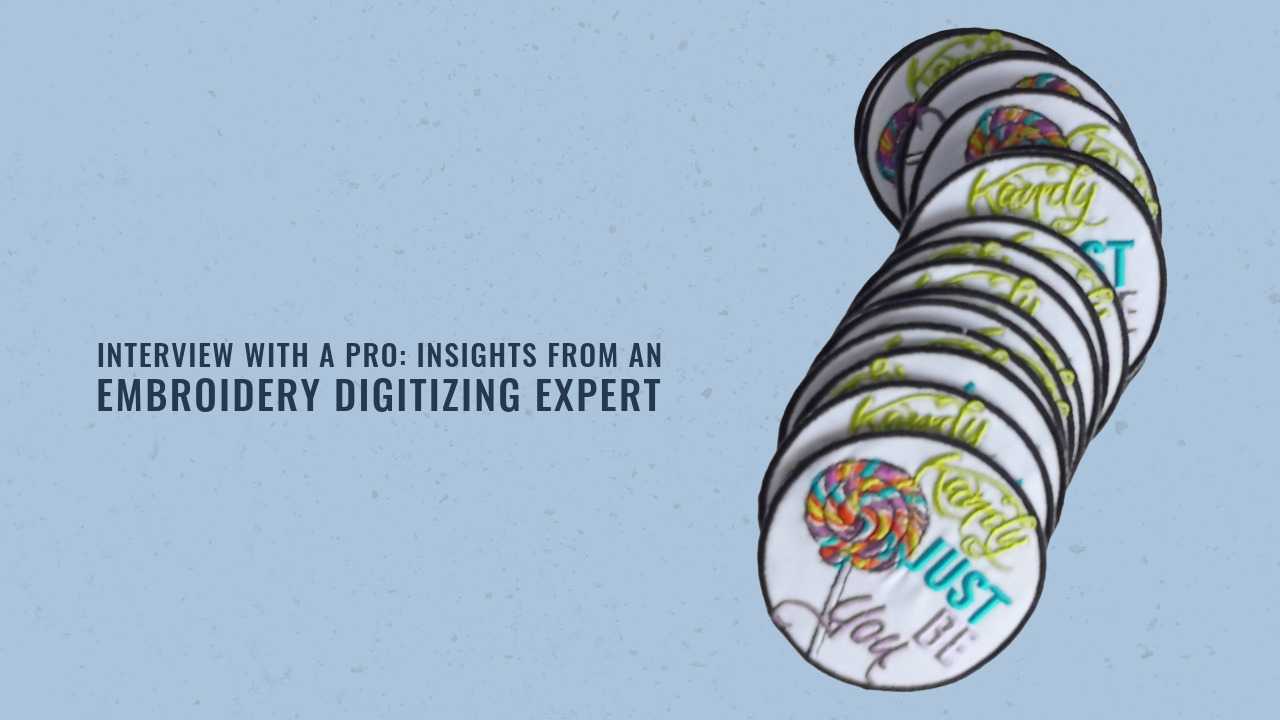
Interview with a Pro: Insights from an Embroidery Digitizing Expert
In the embroidery industry, digitizing artwork into a digital file that computerized embroidery machines can read is a crucial skill that connects creative design and physical production. As commercial embroidery machines gained popularity in the 1980s and 90s, digitizers played an increasingly important role in transferring designs onto fabrics and clothing. <br>The ability to convert artistic artwork into stitch-based embroidery files is made possible by the expertise of skilled digitizers. Without digitizers, embroidery businesses could not operate their automated machines because they would not have the digital patterns necessary to bring their designs to life. Additionally, skilled digitizers optimize designs so that they sew correctly on specific fabrics and surfaces, giving designers the ability to decorate apparel and products at scale. <br>An experienced digitizer shares insider knowledge on this intricate craft in this interview. By transforming concepts into viable files, digitizers occupy an essential niche in making embroidery accessible and achievable, enabling creatives, businesses, and consumers to benefit from embroidery in everyday life. The digitizing process requires both artistic sensibility and technical skill. At its core, it's about problem-solving and communication between digitizers, designers, and embroiderers. <br>How to Begin Digitizing Embroidery <br>After taking art classes in college, John Smith developed an interest in embroidery digitizing because he enjoyed the creative process of creating images and patterns. Following graduation, John began an apprenticeship at a nearby embroidery shop to gain knowledge of the process of digitizing artwork for embroidery machines. <br>It took a lot of practice and trial and error for John to get the hang of the digitizing software; from a simple image or drawing to a digital file that the embroidery machine could read, there was a steep learning curve. John also had to learn to anticipate potential problems and develop an eye for how a design would stitch out. <br>Having actual fabrics, logos, and ideas to digitize helps tremendously in building skills. Digitizing random images doesn't provide the same experience as digitizing for a client. John advises new digitizers to find family, friends, or local businesses willing to provide designs to work on. The biggest challenge when starting out was not having real projects to practice on. <br>John emphasizes that once you get over the initial learning curve, embroidery digitizing is a very rewarding craft. Overall, he says persistence and patience are key when getting started in the field. Expect to make a lot of mistakes at first. But with daily practice and learning from each design, new digitizers can steadily improve their expertise. <br>Digitization Methods and Procedures <br>The basic processes in the digitization process are as follows: Taking a design and translating it into stitches that an embroidery machine can comprehend <br>Preparation - Vector artwork works best here. This includes checking dimensions, tidying up the artwork if necessary, and getting the design ready to digitize. <br>Underlay Stitches- After tacking the cloth down, several stitch types such as contour, edge walk, and zigzag underlay are placed. These stitches create a foundation, increasing stability and keeping the fabric from puckering. <br>Outlines - Satin stitches are frequently used for outlines since they cover the edges smoothly. Proper density and stitch length settings are essential for crisp, clean outlines. <br>Fills - Fills, which can get heavy, are added after outlines to cover greater parts of the pattern. Tattoo fill, cross-hatching, and satin fill are common fill stitch types. Appropriate density settings minimize fabric pull. <br>Detail- Next come details such as tiny writing or delicate features; care is taken to employ little details and short stitches to prevent stitch build-up. <br>Trim Stitches- The embroidery machine's cutter trims extra threads between colour blocks when trim stitches are added in between colour changes. <br>Test Sew out- Before being sent to the customer, the digitalized design is test stitched on the embroidery machine to make sure there are no problems. <br>An expert digitizer develops an eye for stitch types, sequences, and settings over years of turning artwork into beautiful embroidery. Digitizers utilize specialist software such as Wilcom, Pulse, Embird, and Tajima to transform artwork into embroidery files. <br>Gaining a Visual Compass for Design <br>Developing an eye for what constitutes a high-quality, visually appealing design is essential to becoming an experienced embroidery digitizer. This is an art as much as a technical talent. Based on my experience, the following are some significant design elements: <br>Pay attention to shape and form - The major design elements' outlines and silhouettes should have good shape and form; smooth curves and element transitions are preferred over jagged or rough outlines. <br>Think about negative space - The space surrounding and separating design pieces is equally significant. Avoid overly overlapping things. Give the design breathing room. Make use of negative space to highlight specific areas. <br>Select the appropriate stitch count- An overly busy design results from using too many stitches, while an uneven amount can appear choppy. Determine the ideal density to fill forms in a smooth and seamless manner. Emphasize important regions with additional detail. <br>Be aware of the pull compensation - Fabric pulls in somewhat while sewing a pattern, therefore account for this when creating the digital outlines to ensure a smooth finished stitched design. <br>Verify scale and proportions- Verify that all design pieces fit together and are the appropriate size. Pay attention to the proportions across the entire design. <br>Review colours - Make sure there is enough contrast between neighbouring hues. A deliberate colour palette and gradation of tones are used. Too many colours can look cluttered. <br>Avoid switchblade - Stitches should not overlap excessively as this may result in lumping and an unsightly accumulation on the back of the pattern. <br>Embrace simplicity- Clean, uncomplicated designs frequently have a more polished appearance. Complex, detailed concepts can be difficult to implement. <br>It takes time to develop an intuitive sense of good design. Study designs you like. Get input from seasoned digitizers. Try different things to hone your sense of embroidery aesthetics. <br>Managing Clients <br>When it comes to embroidery digitizing, the types of clients one works with can vary greatly. Some digitizers specialize in children's apparel or military emblems; others work with small businesses and entrepreneurs who want custom embroidery for shirts, hats, bags, and other products; still others cater more to large corporations, sports teams, schools, and organizations that require digitizing on a larger scale. <br>Ensuring that clients understand the digitizing process and what you'll deliver is crucial. Communicate design ideas, preferred file formats, and timelines upfront to set expectations. Respond promptly to inquiries and concerns. Send proofs and obtain sign-off before moving forward with final embroidery files. <br>Setting boundaries around revisions and changes to stay profitable, while also striving to please customers and go above and beyond their expectations when feasible, is essential to managing client expectations. Some clients may provide subpar artwork and expect flawless embroidery results; digitizers must educate them on digitizing limitations and push back if necessary. <br>Cost and Business Factors <br>A pricing strategy and business plan are essential when launching an embroidery digitizing company. Some crucial things to think about are: <br>Expense Elements <br>- Equipment: You will require expensive upfront purchases for specialist embroidery software and possibly an embroidery machine. Labour: Since digitizing takes a lot of work, figure out how much an hourly rate will make you profitable <br>- Complexity: Multi-color, high stitch count patterns require more time and money to complete. Rush orders: Extra fees apply for quick turnaround times. <br>Work on Pricing <br>- The most typical price structures are hourly or per-stitch; per-stitch pricing is simpler for clients to predict. Be aware of your expenses. Under-pricing diminishes the value of your job. Overpricing may result in a loss of clients. <br>- Provide package discounts for large orders to encourage volume. <br>- Post rates on your website and be open and honest about your pricing strategy. <br>Managing the Enterprise <br>- Control deadlines and expectations; give more than you promise. <br>- For big works, use contracts and get deposits; this keeps you safe. <br>- Promote yourself using social media, your website, and trade exhibitions. Make a name for yourself. <br>- Create enduring relationships with clients by providing high-quality work and services. <br>- Constantly enhance abilities and make investments in the company. <br>Technology and Industry Trends <br>Over the past ten years, there have been significant technological breakthroughs and changes in the embroidery digitizing sector. Some notable trends include: <br>- The industry's shift to digital. More accuracy, consistency, and efficiency are possible because of this. Hand-drawn designs have been replaced by machines and software that are digitized. <br> Automation is growing. Scanning technology now makes many machines capable of auto-digitizing, which expedites the process, but digitizers still frequently edit auto-digitized files by hand. <br>- New special effects: As digitizing software advances, new tools for producing specialty embroidery such as 3D puff, applique, cross-stitch, and mixed media become easier to use, increasing creative possibilities. <br>- Quicker turnaround times: Modern multi-head embroidery machines have greatly sped up production times, enabling digitizers to handle larger volumes and provide quicker delivery. <br>- Improved connectivity: Remote administration of digitalization and improved collaboration are made possible by cloud-based content sharing and machine connectivity through wifi or ethernet networks. <br>- Growth in apparel decoration: Strong demand for embroidery has been fueled by the trend of garment personalization and customisation, which has sparked innovation in digitization for hats, shirts, jackets, bags, and other items. <br>In terms of using technology to optimize embroidered design inventiveness and production efficiency, the industry prognosis is promising. Digitizers that stay current with the newest tools and techniques will continue to be competitive. <br>Tips for Newbies <br>Although it may seem difficult to get started in the field of embroidery digitizing, it is extremely possible with careful planning and perseverance. Here are some pointers for those who want to do so: <br>Recognize the Software <br>The right foundations will make projects much smoother; invest some time up front to learn your digitizing software inside and out; with regular practice, the tools and settings will become second nature. Don't be afraid to take online classes, watch tutorial videos, and reach out to forums and experts to better understand the software capabilities. <br>Construct a Portfolio <br>Focus on quality over quantity. A few excellent designs are more valuable than dozens of mediocre ones. As you learn, create sample designs to build a portfolio showcasing your skills and style. Whether traditionally embroidered or computer generated, you'll need great examples to demonstrate to potential clients. <br>Discover Your Specialization <br>Finding your niche can help you gradually draw in the correct kind of customers. Think about the design genres that you most enjoy working in and try to focus on those. Some examples of your niche might be monogramming, fonts, animals, floral patterns, or anything else that holds special importance for you. <br>Invest on Quality Tools <br>Although you don't need to start with the priciest machine and software, you should invest in the best equipment you can afford and upgrade it as you go. High-quality tools will reduce frustrations and increase your creative options. Make sure you prioritize essentials like lots of RAM, lots of storage, sharp hoops, and a variety of thread colours. <br>Take Advice From Mentors <br>Make connections with seasoned digital professionals in person or virtually. They can offer guidance and criticism, having gained years of experience and hard-won knowledge to impart. Utilize their knowledge to steer clear of typical pitfalls. Maintain these connections even after you've established yourself. <br>Begin Gradually <br>Be patient; building a clientele and reputation takes time. Start small, with local clients and projects; as your abilities and self-assurance grow, broaden your horizons; avoid taking on too much at first. Provide exceptional service on every project; quality should always come first. <br>Savor the Procedure <br>Accept the creative and technical sides of digitizing. Enjoy the process of seeing your work come to life. Be open-minded, keep learning, and enjoy every new design. If you are passionate about what you do, it will come through in the finished products. <br>Contentment with the Work <br> <br>There's nothing like digitizing a design, sending it off to be embroidered, and then seeing the finished garment or product for the first time. Seeing a design go from idea to finished product is one of the most satisfying aspects of embroidery digitizing. Taking a client's vision and bringing it to life through digitizing is extremely gratifying. One of the things that makes digitizers proud is being able to help brands and businesses showcase custom designs. <br>Digitizing custom designs for people's special occasions, such as weddings or landmark birthdays, creates joy; seeing the delight on a client's face when their vision comes to fruition makes all the hard work worthwhile; ultimately, digitizing is a customer service oriented business; being able to deliver for clients is a major boon. Beyond the creative fulfillment, working with appreciative clients is also highly rewarding. <br>Overall, the creativity, connections, and community make embroidery digitizing a profoundly fulfilling career. Making connections with other digitizers to share knowledge and techniques leads to lasting professional relationships. Being part of advancing the craft and moving the industry forward through collaboration and innovation is extremely gratifying. <br> <br>The Digitizing of Embroidery's Future <br>The expert sees a bright future for embroidery digitizing as long as technology keeps developing. One major advancement is better software, which speeds up and improves the accuracy of the digitizing process. As machines get smarter, the software can punch more of the design automatically instead of having to manually input every stitch, freeing up digitizers to concentrate more on the creative aspects of their work rather than the laborious technical work. <br>The expert believes that in the upcoming years, 3D digitizing will become more widely used. This will enable the creation of embroidery designs that have a more realistic, multidimensional feel. As this software advances, new design possibilities will become possible. In addition to 3D digitizing, the expert anticipates increased innovation in special effects using specialty threads and stitches. This will enable the creation of more vivid, eye-catching designs. <br>The growth of online marketplaces and communities for the sale and exchange of digitized designs is expected to continue, opening up new avenues for individual digitizers to market and sell their work internationally and facilitating simpler worldwide collaboration amongst designers. <br>All things considered, the future appears bright for imaginative and technologically astute digitizers who keep abreast of the most recent advancements in software, tools, and design methodologies. The capacity to use technology to produce ever-more-complex embroidery will result in growing prospects in this industry.
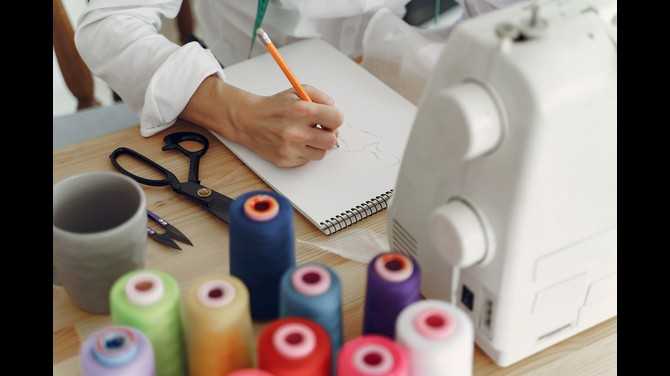
digitize4life
Embroidery digitizing is the process of converting artwork into an embroidery machine-readable file format. It allows you to take any image or logo and recreate it in stitch embroidery on fabric using an embroidery machine. Digitizing software plays a crucial role in this process by providing the tools to convert vector or bitmap artwork into a series of stitch coordinates that the embroidery machine can follow to sew out the design. <br> <br> <br> <br>Having the right digitizing software can make all the difference in achieving professional, high-quality embroidery output. The digitizing process requires precision and attention to detail in order to translate artwork into clean, well-defined stitches that hold their shape without distortion. With poor software, embroidery designs can result in messy stitches, distorted shapes, loose connections, and thread breaks. The right tools give you control over stitch types, density, underlays, pull compensation, and more to optimize embroidery production. <br> <br> <br> <br>In this review, we will compare the top embroidery digitizing software on the market today. We will look at the key features, capabilities, advantages, and limitations of each program. Our goal is to provide embroidery business owners, apparel decorators, and crafters with the information needed to select the best digitizing solution for their needs and budgets. With the right software, you can digitize designs faster and achieve flawless embroidery output every time. <br> <br> <br> <br>What is Embroidery Digitizing Software? <br> <br>Embroidery digitizing software is used to convert artwork into machine-readable embroidery designs. The software takes artwork such as a logo, clipart, drawing, or photograph and converts it into a file that contains embroidery stitch data. <br> <br> <br> <br>These stitch files can then be loaded onto computerized embroidery machines to sew out the designs onto fabric. Embroidery digitizing software gives users a wide range of design capabilities, allowing them to edit and customize artwork to create exactly the embroidery designs they want. <br> <br> <br> <br>The main functions of an embroidery digitizer are: <br> <br> <br> <br>Convert vector and raster images into stitch data. The software will analyze the artwork and automatically generate stitch types, stitch directions, stitch density, and other settings required for the design. <br> <br> <br> <br>Provide design editing tools to customize and optimize embroidery designs. This includes features like reshaping design elements, adding and removing stitches, changing stitch types and angles, splitting and combining designs, adding text and lettering, and more. <br> <br> <br> <br>Output finished embroidery designs into the file formats required by different embroidery machine models and brands. The most common output formats are DST, EXP, PES, JEF, and more. <br> <br> <br> <br>By utilizing embroidery digitizing software, crafters, home business owners, and commercial embroiderers can take any artwork and convert it into files their machines can read, allowing them to embroider custom designs in any size and onto any fabric type. The software gives users creative control over the digitizing process for high-quality results. <br> <br> <br> <br>Top Embroidery Digitizing Programs <br> <br>Embroidery digitizing software allows you to create embroidery designs that embroidery machines can sew. When selecting an embroidery digitizing program, it's important to evaluate the top tools available to find one that best fits your needs and budget. Here's an overview of some of the leading options on the market: <br> <br> <br> <br>Wilcom EmbroideryStudio - A highly versatile and full-featured digitizing program used by professionals and hobbyists alike. It has powerful design tools and supports multiple machine formats. The learning curve can be steep. <br> <br> <br> <br>Pulse Ambassador - Designed for hobbyists, Pulse Ambassador has an intuitive interface and is easy to learn. It has basic digitizing features and supports fewer machine formats than professional tools. More affordable pricing. <br> <br> <br> <br>Bernina Artlink: Made by the sewing machine brand Bernina, this program seamlessly integrates with their machines. It has intermediate-level tools and capabilities. Works best for Bernina owners. <br> <br> <br> <br>Brother PE-Design: Created specifically for Brother embroidery machines, this software has a simple interface optimized for home embroidery. Affordable pricing but fewer features than professional programs. <br> <br> <br> <br>Embrilliance StitchArtist - Offers advanced digitizing capabilities in an easy-to-use package. Specializes in lettering and font creation. Intermediate pricing and features. <br> <br> <br> <br>Janome Artistic Digitizer - Designed by Janome for use with their machines. User-friendly tools for home embroidery enthusiasts. Only compatible with Janome machines. <br> <br> <br> <br>Floriani Total Control U - A mid-range program with intermediate tools but more capabilities than hobbyist software. Known for realistic textile simulations and flourishing features. <br> <br> <br> <br>Core Features to Look For <br> <br>When evaluating embroidery digitizing software, there are several key features to look for that will determine how user-friendly and capable the program is. <br> <br> <br> <br>Auto Digitizing: This feature converts artwork like jpeg, png, and vector files into embroidery designs automatically. It saves a huge amount of time versus having to digitize artwork or photos from scratch manually. The best auto-digitizing tools allow you to set different parameters and adjust the output as needed. <br> <br> <br> <br>Editing Tools: Look for software with robust editing capabilities that allow you to modify and refine auto-digitized designs or manually create embroidery files. Key editing tools include functions like stitch editing, reshaping objects, adding and deleting stitches, color editing, and more. Advanced programs may include special effects tools. <br> <br> <br> <br>Machine File Outputs: A digitizing program needs to be able to export designs in all the popular machine embroidery file formats, including DST, PES, EXP, JEF, and more. This ensures compatibility and hassle-free transfer of designs to any embroidery machine brand. <br> <br> <br> <br>Design Library: Many programs come pre-loaded with libraries of ready-made designs like fonts, motifs, patterns, borders, and more. This gives you a head start on new projects without having to digitize everything manually. Some software offers pay-as-you-go access to giant cloud-based design libraries with thousands of designs. <br> <br> <br> <br>Ease of Use <br> <br>When evaluating embroidery software, the user interface and overall ease of use should be top considerations. After all, you want software that will make digitizing faster and easier, not more difficult! Here are some key factors to look at: <br> <br> <br> <br>User Interface <br> <br>Is the interface modern, clean, and intuitive? Or dated and cluttered? Clean layouts with smart toolbars help you digitize faster. <br> <br> <br> <br>Are all the main tools easily accessible? You want to minimize hunting around for basic functions. <br> <br> <br> <br>Does it offer both vector and bitmap views? Seeing both can help with precision. <br> <br> <br> <br>Can you customize the workspace? Tailoring it to your preferences boosts efficiency. <br> <br> <br> <br>Learning Curve <br> <br>How steep is the learning curve? Look for software with a more gentle curve so you can get up and running quickly. <br> <br> <br> <br>Does it use understandable terminology vs technical jargon? Opt for simpler language. <br> <br> <br> <br>Do tutorials walk you through the software? Step-by-step guidance helps build skills. <br> <br> <br> <br>Is the help indexed and searchable? This makes it easy to find answers. <br> <br> <br> <br>Help Resources <br> <br>Is there a knowledge base or user forum? These let you tap into a community. <br> <br> <br> <br>Can you contact customer support if needed? Direct technical assistance is invaluable. <br> <br> <br> <br>Does it offer live training sessions? Real-time learning can accelerate mastery. <br> <br> <br> <br>Are there video tutorials available? Visual learners will prefer these. <br> <br> <br> <br>Prioritizing user-friendliness helps ensure the software doesn't slow you down. Look for an intuitive interface, a gentle learning curve, and robust help resources. <br> <br> <br> <br>Advanced Capabilities <br> <br>Embroidery digitizing software with advanced features goes beyond the basics to enable specialty techniques and automation capabilities used by professionals. Look for these key features when evaluating higher-end software: <br> <br> <br> <br>Specialty Techniques Like Applique <br> <br>Some programs allow you to digitize applique designs, where one fabric is sewn on top of another. This involves creating two separate designs - the applique shape and the placement outline. Advanced software will automate the process so you can easily digitize appliques. <br> <br> <br> <br>Multi-Head Splitting <br> <br>Commercial machines often have multiple embroidery heads. Multi-head splitting automatically divides designs so they can be stitched across multiple heads simultaneously. This saves a ton of time compared to manually splitting designs. <br> <br> <br> <br>3D Simulation <br> <br>Seeing how an embroidery design will actually stitch out can help identify any issues before going to the machine. Some software includes a realistic 3D simulation that shows the sequence of stitches and the outcome. This helps refine designs digitally rather than through trial and error on the machine. <br> <br> <br> <br>Advanced capabilities like these enable embroidery digitizers to create more complex, higher-quality designs with greater efficiency. Look for software with specialty techniques relevant to your work so you can digitize at an expert level. <br> <br> <br> <br>Output File Formats <br> <br>When selecting an embroidery digitizing software, one of the most important considerations is which file formats it can export designs in. The main file formats you'll want to look for include: <br> <br> <br> <br>DST - This is the most common machine embroidery format. Most embroidery machines use the DST format, including commercial machines like those from Tajima and Barudan. DST supports multiple color design capabilities. <br> <br> <br> <br>EXP - EXP is another very common embroidery machine format supported by commercial machines from brands like Melco. Like DST, it handles multi-color embroidery designs. <br> <br> <br> <br>PES - Many home embroidery machines use the PES format. Popular brands supporting PES include Brother, Baby Lock, Bernina, Husqvarna Viking, Pfaff, and Singer. <br> <br> <br> <br>PCD - PCD is the proprietary format used by Janome embroidery machines. It has some file size limitations compared to DST and EXP. <br> <br> <br> <br>VP3 - VP3 is the format used by embroidery machines from Husqvarna Viking. It allows the creation of very dense designs with short stitches. <br> <br> <br> <br>JEF - JEF is the file format for Janome embroidery designs. Most digitizing software can export JEF files. <br> <br> <br> <br>The more machine formats the software can export to, the better. This allows maximum compatibility and flexibility. At a minimum, you'll want software that can export DST and EXP for commercial machines and PES for common home models. The ability to output less common formats like PCD and VP3 is also a nice bonus for added versatility. <br> <br> <br> <br>When evaluating a file format, also consider any limitations in terms of the number of colors, stitches, or design density. Some proprietary formats like JEF and PCD have more constraints than universal formats like DST. Understanding the capabilities of each format will allow you to choose the best one for your particular embroidery design. <br> <br> <br> <br>Design Libraries <br> <br>A key factor when evaluating embroidery digitizing software is the design libraries included. Having a large library of high-quality pre-made designs can save digitizers substantial time and effort. Here are some considerations when assessing design libraries: <br> <br> <br> <br>Quantity of designs: Look for software that includes thousands of designs across various categories like floral, wildlife, holidays, monograms, etc. More designs mean more options to choose from or modify. <br> <br> <br> <br>Design quality: Ensure the pre-made designs are high-resolution and production-ready. Low-quality or pixelated designs will not embroider well. <br> <br> <br> <br>Design categories: Diverse categories and design sets allow the creation of projects for various needs and occasions. Seasonal, occupational, sports, pets, and religious sets expand your range. <br> <br> <br> <br>Formats include - Opt for libraries with designs available in multiple popular formats.DST, .EXP.PES, VP3, etc. This allows using the designs across different machines. <br> <br> <br> <br>Search and filtering: To easily locate designs, software should have keyword search and filtering by theme, format, size, etc. <br> <br> <br> <br>Customization: Look for the ability to edit colors, resize, combine, and customize included designs. This provides more flexibility. <br> <br> <br> <br>New designs: Some software provides continuous new designs added over time to keep the library fresh. This brings more value. <br> <br> <br> <br>With large design sets that are high quality and customizable, digitizers gain an invaluable starting point for projects. Assessing both the quantity and quality of included libraries helps choose the best software. <br> <br> <br> <br>Pricing <br> <br>When evaluating embroidery digitizing software, pricing is an important consideration. Programs generally fall into one of two pricing models: <br> <br> <br> <br>One-Time Purchase vs Subscription <br> <br>One-time purchase: These programs involve paying an upfront cost to own the software permanently. Popular one-time purchase options include Embird and StitchArtist. The benefit is you pay a single price and own the software forever. The drawback is you don't get included upgrades or new features without paying an additional fee. <br> <br> <br> <br>Subscription: With a subscription model, you pay a recurring monthly or annual fee to use the software. Wilcom and Pulse Microsystems operate on a subscription basis. The advantage is you always have the latest version with new capabilities. The downside is you never fully own the software and have to maintain payments to keep using it. <br> <br> <br> <br>Price Ranges <br> <br>Here are typical price ranges for top embroidery digitizing programs: <br> <br> <br> <br>Entry-level - $100-$300 one-time purchase. Limited capabilities but low cost. Good for beginners. Examples are Embird and SewArt. <br> <br> <br> <br>Mid-range - $300-$1000 one-time purchase or $15-$50 monthly subscription. Robust features for pros. Popular options are StitchArtist and Annesse. <br> <br> <br> <br>High-end - $2000+ one-time purchase or $100+ monthly subscription. Heavy-duty tools for enterprise usage. Wilcom and Pulse fall into this premium category. <br> <br> <br> <br>The pricing model and range you choose depends on your skill level, usage requirements, and budget. Evaluating your needs can help determine the best investment. <br> <br> <br> <br>Conclusion <br> <br>In summary, embroidery digitizing software enables you to create machine embroidery designs from artwork. The top programs provide user-friendly interfaces combined with powerful tools to convert images into high-quality embroidery files. <br> <br> <br> <br>Key factors to evaluate include: <br> <br> <br> <br>Ease of use for beginners, but advanced capabilities for experienced users <br> <br>Ability to edit artwork, stitch settings, colors, and more <br> <br>Output file formats supported <br> <br>Design libraries and fonts included <br> <br>Pricing and value <br> <br>For most crafters and small business owners, Wilcom e4 and Embird offer an ideal combination of features, capabilities, and affordability. Both provide an effective set of tools for converting artwork to embroidery while remaining simple enough for hobbyists to learn. <br> <br> <br> <br>More advanced users may benefit from the expanded toolsets in Husqvarna Viking's PREMIER+ suite or Bernina's ArtLink software. However, these come at a higher price point. <br> <br> <br> <br>Ultimately, it's worth investing in a quality embroidery digitizing program if you want to take your designs to the next level. The right software makes it possible to turn any image or artwork into a polished, customizable embroidery pattern. <br> <br>[a]https%3A%2F%2Fwww.digitize4life.com[/a]
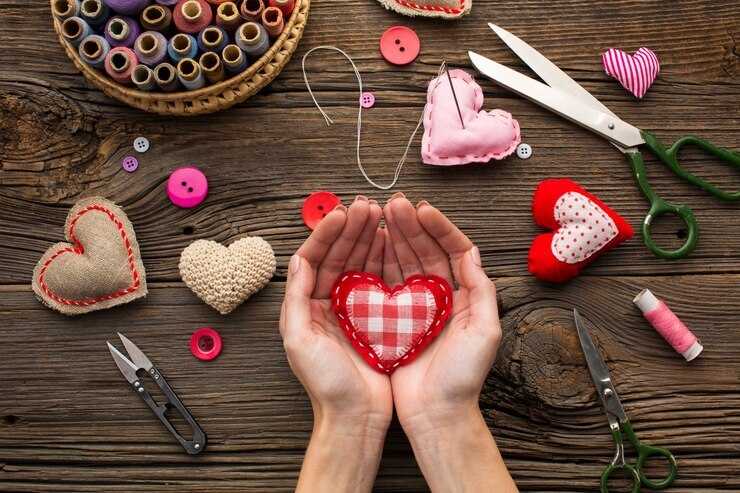
Unlock Personalized Bliss: Embroidery Digitizing for Unique Gifts
The custom gift industry has seen immense growth in recent years. According to [statistics source], sales of personalized gifts increased by over 30% from 2020 to 2021. Customers today want unique presents that feel special and heartfelt. <br>Embroidery digitizing is revolutionizing the world of customization. With digitizing, any image or logo can be converted into embroidery data and stitched onto fabric. This process enables endless possibilities for custom embroidered gifts. Companies can take a customer's design and precisely reproduce it for hats, shirts, blankets, and much more. <br>Embroidery digitizing allows for incredible flexibility when creating personalized gifts. With just some images and imagination, you can make one-of-a-kind presents for loved ones. This article will explore the customization options made possible by digitizing, from sentimental gifts for families to branded items for businesses. Read on to discover how embroidery digitizing can help you create heartfelt gifts and cherished keepsakes. <br>What is Embroidery Digitizing? <br>Embroidery digitizing is the process of converting artwork or an image into embroidery data that an embroidery machine can read. It allows any design to be stitched onto fabric or other materials using computerized embroidery machines. <br>Unlike regular embroidery done by hand, embroidery digitizing uses technology to translate designs into stitch patterns and embroidery commands. The image is imported into embroidery digitizing software, which analyzes the artwork and converts it into a digital embroidery pattern. <br>The digitizing software creates stitch files that contain thread color, stitch type, stitch length, and sewing order information. This stitch data allows the embroidery machine to recreate the original design on fabric by following the digitized pattern. The result is an embroidered design that accurately matches the original image. <br>Digitizing converts artwork into stitch embroidery data rather than creating the embroidery itself. The digital files are then loaded onto the embroidery machine, which reads the stitch pattern data and sews out the design onto the material. This makes it easy to get consistent embroidery results in large volumes. <br>Benefits of Digitized Embroidery <br>Digitizing embroidery brings numerous benefits over traditional hand embroidery. First, digitizing is significantly faster than stitching designs by hand. An experienced embroiderer may be able to complete a small design in a few hours. But with digitizing software, even complex designs with thousands of stitches can be created in minutes. <br>Digitizing also allows for more precise and consistent stitches. The digitizing software plots the exact placement and length of every stitch. This level of precision is almost impossible to achieve by hand. The digitized embroidery machine can then re-create the design with a very high degree of accuracy each time. <br>Another major advantage of digitized embroidery is the ability to scale designs without any loss of quality easily. The digitized embroidery file contains vector graphic data. So, the design can be resized smaller or larger on a computer screen without getting blurry or pixelated. This allows taking a design and using it on projects of all sizes without needing to re-stitch it. <br>Finally, digitized designs can be edited and modified much more easily compared to hand embroidery. Elements like text can be changed or added in seconds. Colours can be adjusted throughout the entire design simultaneously. Parts of the design can be rearranged, removed, or duplicated as needed. This simplifies edits that would require undoing and re-stitching large sections by hand. <br>Customization Options <br>Thanks to embroidery digitizing, the customization options for personalized gifts are practically endless! Some of the most popular custom touches include: <br>- Names, initials, monograms**: Add a name, set of initials, or monogram to make any gift extra special for the recipient. Monogramming looks classic on clothes, blankets, tote bags, and more. <br>- Meaningful dates and messages**: Commemorate a special date like a birthday, anniversary, or graduation by embroidering it onto a gift. Heartfelt messages and inspirational quotes also make wonderful personalized details. <br>- **Photographic images**: Turn a favourite photo into an embroidered picture that recipients will treasure. Baby portraits on a blanket or scenic images on a pillow make perfect personalized keepsakes. <br>- Company logos and branding**: Use digitized logos and custom branding to embellish corporate gifts and apparel. It's a stylish way to outfit employees and promote your brand. <br>The options are endless when you utilize embroidery digitizing to customize gifts. Add a heartfelt touch by personalizing presents with names, dates, inspirational messages, photos, or company logos that make the gift extra meaningful. <br> <br>Gifts for Loved Ones <br>Digitally embroidered gifts are a thoughtful way to celebrate major life events and show your loved ones how much you care. Here are some ideas for special custom embroidered gifts: <br> <br>Wedding and Anniversary Gifts <br>- Personalized embroidered robes and slippers make luxurious his and hers wedding gifts. Monogrammed with the couple's new shared last name or wedding date, they'll be treasured keepsakes. <br>- For milestone anniversaries, create an embroidered wall hanging with the couple's names and wedding dates. A ring pillow with their anniversary date is another neat gift. - Coordinating embroidered blankets or canvas tote bags to make practical anniversary presents they can enjoy together. <br>New Baby Gifts <br>- Welcome baby with a personalized blanket, burp cloth, or bib embroidered with their name and birth stats. <br>- Commemorate baby's first year with monthly "milestone" onesies featuring whimsical designs and their age. <br>- For a baby shower gift, embroider swaddle cloths with sweet motifs like elephants, rocking horses, or ducks. <br>Sentimental Gifts for Mom/Dad <br>- Make mom's day with an apron embroidered with "World's Best Mom" or her name. Or try a personalized barbecue set for Dad. <br>- A photo throw pillow with an old family picture and an endearing message makes a heartfelt gift. <br>- For parents' birthdays, embroider pillowcases or bags with nostalgic photos from your childhood. <br>Romantic Gifts for Your Significant Other <br>- Custom embroidered t-shirts with an inside joke or romantic quote make playful Valentines. For men, embroider a soft robe or socks. <br>- Commission a piece of wall art featuring your name or wedding date for an anniversary. <br>- A set of his and hers pillowcases embroidered with sweet sayings make great newlywed gifts. <br>Gifts for Children <br>Kids love seeing their names or initials on their belongings, so digitized embroidery is perfect for personalized children's gifts. Some top options for customized birthday and everyday gifts include: <br> <br>- Backpacks and lunch boxes <br>- Having their name embroidered on a new backpack or lunchbox makes kids excited to bring them to school. You can choose colourful designs and fonts that fit your personality. <br>- Blankets and stuffed animals <br>- Few things are sweeter than a snuggly blanket or stuffed animal with your child's name or initials embroidered on it. This adds an extra special touch to the gift. <br>- Sports team logo items <br>- Kids who are big fans of a sports team will light up if you give them a blanket, backpack, or shirt embroidered with their favourite team's logo. Search for the team logo to digitize and add to any item. <br>The great thing about embroidered gifts for kids is they'll get years of use out of them! The embroidery will hold up wash after wash while always reminding them of your thoughtfulness each time they wear or carry it. <br>Gifts for Businesses <br>Embroidery digitizing allows businesses to add a custom, branded touch to promotional items and office decor. Getting company logos and names digitized for embroidery opens up many possibilities for unique business gifts and swag. <br>- Logo embroidered on shirts, hats, bags. Promotional swag like polos, caps, and totes make great gifts for clients, partners, and employees. Adding a digitized embroidery logo elevates a basic promo item into a high-end, personalized gift that recipients will appreciate and remember. <br>- Employee name badges. For a welcoming office environment, embroidered name badges look professional and help team members connect on a personal level. With digitizing, any name can be created with consistent quality and branding. <br>- Custom interior office decor. Take office design up a notch with digitized embroidery art, maps, inspirational quotes, or branding featured on framed prints, pillows, wall hangings, and more. An office adorned with custom embroidered accents feels cohesive, unique, and warm. <br>The right digitizer can take a company's logo and ideas and transform them into remarkable embroidered gifts and objects that leave lasting positive impressions on clients, partners, and employees alike. <br>Other Custom Embroidered Items <br>Digitizing embroidery opens up many possibilities for custom embroidered items beyond just clothing. Some other popular embroidered gift and personalization ideas include <br>Pet Accessories <br>Add your pet's name or fun designs to collars, bandanas, leashes, beds, and more. Custom embroidered pet items make great gifts for pet lovers. Personalize a collar with your dog or cat's name, or choose fun icons that match their personality. <br> <br>Home Decor <br>Personalize pillows, blankets, towels, wall hangings, and other home decor items. Embroider names, monograms, inspirational quotes, or favourite photos to make your home decor unique. Embroidery is a creative way to customize aprons, oven mitts, pot holders and other kitchen linens as well. <br>Wearables <br>Embroidery can be used to customize all types of wearable accessories like jackets, caps, beanies, aprons, scarves, and more. Monogrammed or embroidered items make thoughtful gifts. A personalized embroidered jacket makes a great gift for a graduate or sports fan. Choose custom designs to match the recipient's hobbies, interests, or personality <br> <br>How to Get Started with Digitized Embroidery <br>Getting started with digitized embroidery is easy, whether you want to create your files or partner with an embroidery digitizing service. Here's an overview of the process: <br>Digitizing Software <br>There are a few options for embroidery digitizing software that allow you to create .dst or .emb files. Popular options include: <br>- Wilcom Embroidery Studio <br>- Pulse Ambassador <br>- Stitch Era Universal <br>- Embird <br>These programs have a learning curve, so it's ideal for advanced crafters who want to create lots of designs. Work with a Digitizing Service <br>For beginners or anyone looking for convenience, partnering with an embroidery digitizing service is recommended. You simply send them your logo or design idea, and they'll create a custom digitized file for your machine to stitch out. <br>Most digitizing services charge $3-$5 per thousand stitches, so simple designs are very affordable. This saves you the hassle of learning digitizing software. <br>File Formats <br> <br>The most common file formats are .dst and .emb. Your embroidery machine manual will specify which file types it can read. Some newer commercial machines can read multiple formats, while older home embroidery machines may only be compatible with .dst. If you order digitizing services, make sure to request your preferred format. <br>Machine Requirements <br> <br>To stitch out embroidery, you need an embroidery-only machine or a sewing/embroidery machine combo. Machines under $300 are suitable for home crafters doing occasional projects. Machines $800+ are better for frequent use. <br>The size of your hoop/frame will determine the maximum design size. Make sure digitized designs fit your hoop, or have them split into multiple files. Most machines list compatible hoop sizes. <br>With the right digitized file and embroidery machine, you're ready to stitch out custom embroidered gifts and apparel for your loved ones! <br>Conclusion <br>Embroidery digitizing opens up a world of possibilities for creating personalized, custom gifts. As we've covered, digitization transforms your ideas into files that embroidery machines can read, allowing for customized embroidery on fabric items like t-shirts, hats, towels, bags, and more. <br>Some key benefits of digitized embroidery for gift-giving include: <br> <br>- Personalization - Add names, initials, photos, and meaningful designs that make your gift unique. <br>- Creativity - Digitization enables you to turn any image or logo into an embroidered patch or design. The possibilities are endless. <br>- Quality - Digitized designs ensure high-stitch quality and durability, especially for fabrics like t-shirts. The embroidery will last wash after wash. <br>- Convenience - Work with an embroidery digitizing service for quick and easy customization. Send your ideas and get digitized files back within days. <br>- Cost-Effectiveness - No minimum order quantities. Digitized designs make small batch or single-item orders affordable. <br>As customization and personalization trends continue to grow, embroidery digitizing is here to help you create cherished gifts tailored to the recipient. Imagine the smile when you present a hand-embroidered blanket to a newborn, a digitized family portrait on a blanket for grandparents, or a business logo on polos for your team. <br>If you're ready to explore digitized embroidery, simply [contact our embroidery digitizing services ([a]https%3A%2F%2Fwww.example.com%29[/a] today to get started! We're ready to make your design ideas a reality. <br> <br>[a]https%3A%2F%2Fwww.digitize4life.com%2F[/a]
johnheggan
Embroidery file formats define how embroidery patterns are digitally encoded and stored. Just like JPEGs and PNGs for images, there are different formats for storing embroidery designs. The file format determines compatibility with different embroidery machines, the quality and capabilities of the final design, and options for editing the pattern. <br> <br>Choosing the right embroidery format is an important decision that impacts your workflow and final products. Even if you purchase digitized designs from others, you may need to convert formats to work with your specific machine. Understanding the key differences between embroidery file types allows you to make an informed choice. <br> <br>The most common machine embroidery formats include DST, PES, EXP, ART, HUS, VP3, and XXX. Each has advantages and disadvantages that suit different applications. As you explore embroidery digitizing, you'll likely encounter these acronyms frequently. This guide breaks down the key characteristics, benefits, and limitations of the major embroidery file formats to help you select the right one. With knowledge of the formats, you can achieve the best results on your preferred machine and software. <br> <br>DST Format <br>The DST file format was created by Tajima, a Japanese embroidery machine manufacturer, in the late 1980s. DST stands for ""Tajima Stitch File,"" and it quickly became one of the most common embroidery file formats in use today. <br> <br>DST is extremely prevalent with commercial embroidery machines and remains one of the core file formats. It uses a binary file type that contains embroidery stitch data. When a digitizer creates an embroidery design, the design software converts it into a DST format that an embroidery machine can read. <br> <br>One downside of the DST format is its limited color palette. It only supports a maximum of 256 colors per design. This can be restrictive for more complex or detailed embroidery designs that require a lot of colors and color changes. The age of the format also means DST lacks some of the more advanced features of newer embroidery file types. However, it remains a tried-and-true format that most embroidery machines are compatible with. <br> <br>For many embroiders and commercial embroidery shops, DST will be one of the main file formats they use day to day. While it may not be the most versatile or future-proof, the ubiquity of DST support means it will continue to hold an important place in the embroidery world. <br> <br>PES Format <br>The PES format was developed by the Japanese sewing machine company Brother and has become one of the most popular embroidery file formats. PES stands for Brother Industries' Embroidery System. Some key things to know about the PES format: <br> <br>- Created by Brother - The PES format was designed and created by Brother Industries specifically for use with their embroidery machines. This proprietary format helped promote the use of Brother embroidery machines by only supporting Brother's machines initially. <br> <br>- Supports more stitches and colors - One advantage of the PES format over earlier formats like DST is its ability to store more stitch and color data. PES files can contain up to 300,000 stitches per design and up to 127 thread colors. This allows for more intricate and detailed embroidery designs. <br> <br>- Used by many hobby embroidery machines - While introduced for Brother machines, the PES format went on to be supported by most home and hobby embroidery machines. Major brands like Singer, Bernina, Janome, and Husqvarna Viking all support PES files on their household machines. So, it has become a very common format among hobby embroiderers. <br> <br>The PES format's widespread compatibility and ability to handle complex designs with many colors is why it emerged as such a popular format for distributing embroidery designs. Most design digitizers and sellers offer their designs in PES in addition to other common formats like DST. <br> <br>EXP Format <br>Melco developed the EXP embroidery format, which contains complete design information, including stitches, colors, thread types, and sequence. A key benefit of the EXP format is that it allows editing of the design after digitizing, unlike formats such as DST, which are ""stitch"" based. <br> <br>With EXP files, you can add and remove stitches, change colors, and edit stitch types. The files store both graphic design information as well as stitches. When the design software exports an EXP file, it generates the stitches based on the underlying design. <br> <br>This makes the EXP format ideal for embroiderers who want flexibility in editing designs after the digitizing process. The editing capabilities allow errors to be fixed and customization to be done. Many embroidery software programs can export EXP files in addition to their native file format. <br> <br>The one downside is that EXP files tend to be large since they contain detailed design data. But the full editing capabilities more than makeup for the larger file size for most embroiderers. <br> <br>EXP is an open format that can be read by most embroidery software and machines. So, if your workflow benefits from post-digitizing editing, the EXP format is an excellent choice over more locked-down options. <br> <br> <br>ART Format <br>The ART format is proprietary to Janome sewing machines. It contains stitch pattern data as well as thread color information. <br> <br>ART files can contain multiple embroidery designs and lettering. The designs can be resized, rotated, edited, combined, and resequenced using Janome's Artistic Digitizer software. This allows for customization and editing capabilities beyond just stitching out a stock design. <br> <br>Some key advantages of the ART format include: <br>- Native format for all Janome embroidery machines, ensuring full compatibility. <br>- Contains both stitch data and thread color information, allowing complete recreation of the design. <br>- Designs can be edited and customized using included software. <br>- Supports multiple designs and lettering within a single file. <br>- Resizing, rotating, editing, combining, and resequencing of designs is possible. <br> <br>The main limitation of ART is that it is a proprietary format that only works with Janome brands. So, it lacks the universal compatibility of something like the popular DST format. But for Janome owners, it provides a versatile format with powerful editing capabilities. <br> <br>## HUS Format <br>The HUS embroidery file format was developed by Viking, a European company that manufactures sewing and embroidery machines. As the name suggests, HUS files are primarily used in Europe by Viking machine owners. <br> <br>The HUS format can support up to 256 different thread colors. This makes it ideal for handling complex multi-colored embroidery designs with many color changes and stops. HUS files contain the stitch data as well as thread color change commands, which instruct the embroidery machine when to switch threads. <br> <br>Having a high maximum number of colors gives embroiderers a lot of flexibility when working with intricate designs that require a large color palette. The downside is that some simpler embroidery machines may not be able to support that many thread colors. So, HUS files are best suited for more advanced Viking models. <br> <br>Overall, the HUS file format allows European embroiderers using Viking machines to work with rich, multi-colored embroidery patterns with numerous color stops. While not as ubiquitous worldwide as DST or PES formats, HUS occupies its niche market in Europe. <br> <br>## VP3 Format <br>The Pfaff sewing machine company created the VP3 embroidery file format. VP3 files store embroidery stitches and designs as vector graphics rather than bitmap images. This allows the stored designs to be resized and scaled without losing quality or detail. <br> <br>VP3 files can contain multiple colors and retain information about the sequence of stitches and color changes required to embroider the design. The format uses mathematical vector descriptions of each stitch path, rather than pixels, to represent the design. <br> <br>The main advantage of the VP3 format over bitmap-based formats is the ability to infinitely scale designs larger or smaller without pixelation or stitch quality loss. Complex designs with many colors can be resized while preserving clean stitch edges. This makes VP3 a versatile and high-quality embroidery format. <br> <br>Some other notable features of the VP3 file format include: <br> <br>- Support for up to 127 distinct thread colors per design. <br>- Retains editable stitch and color sequence information. <br>- Stores thread brand, color name, and color code data. <br>- Includes design metadata like name, author and notes. <br>- Supports multi-position hoops and design splits. <br>- Widely supported by embroidery software and machines. <br> <br>The vector-based nature of VP3 makes it an excellent choice for scaling and editing high-quality embroidery designs. It is one of the most versatile and widely supported professional embroidery formats available today. <br> <br>## XXX Format <br>Singer developed the XXX embroidery format, which contains stitch and trim information. XXX is a simple, minimal format with some limitations compared to more advanced formats. <br> <br>XXX only supports a limited number of thread colors and has no support for specialty threads or techniques. The stitch information is also basic, with no detailed settings for stitch effects. <br> <br>While easy to work with, the XXX format may result in embroidery designs that lack detail and complexity compared to files saved in other formats. The XXX format works well for simple logo or text designs but is not well-suited for intricate or photo-realistic embroidery. <br> <br>XXX files cannot store artwork elements, only the final stitch embroidery data. This makes editing or adjusting the designs difficult compared to formats that retain vector artwork. <br> <br>Overall, the XXX embroidery format is a proprietary Singer format that works for simple designs but lacks support for advanced design features. Most embroiderers need access to other format options for more complex projects. Converting XXX files to other formats can allow for better design editing capabilities. <br> <br>## Choosing a Format <br>When selecting an embroidery file format, there are a few key considerations: <br> <br>- **Consider your machine brand and software**. The two most common embroidery machine brands are Brother and Baby Lock, which use the PES format, while Bernina, Janome, and Singer machines generally use the DST format. Before choosing a format, check which file types are compatible with your specific machine model and any editing software you plan to use. <br> <br>- **DST and PES are the most widely supported formats**. Due to their compatibility with popular machine brands, DST and PES tend to be the safest options if you want to share and distribute embroidery designs. Most machines are able to read these standard formats. <br> <br>- **EXP and ART may offer more editing options**. Less common formats like EXP and ART are proprietary to certain software programs like Embird and Wilcom. While you may have more editing features with these formats, they are less universally compatible with various machines. <br> <br>- **Certain formats preserve stitches better**. DST and PES files can sometimes distort stitches when rescaling or rotating designs. However, EXP files use true stitch point data so the embroidery integrity is preserved when making adjustments. <br> <br>- **Some formats support multiple hooping**. DST, PES, and ART allow dividing designs into separate hoopings, while EXP and other formats have a single hoop layout. <br> <br>Overall, DST and PES are the best starting points for broad compatibility. But if your machine supports other formats, EXP and ART provide added editing perks at the expense of wider usability across platforms. Consider how you plan to edit and share the designs when picking your ideal file format. <br> <br>## Converting Between Formats <br>When working with different embroidery file formats, you may find yourself needing to convert a design from one format to another. Many embroidery digitizing and editing programs have built-in features to import and export different file types. For example, you could open a .pes file in Embird and then export it as a .dst file. <br> <br>However, it's important to be aware that converting between formats often leads to some data loss or changes to the design. The conversion process is not perfect, so some stitches or design elements may be altered or omitted entirely when going from one file type to another. Small details can get lost. <br> <br>For this reason, it's best to digitize embroidery designs in the file format native to your machine or software if possible. For example, if you are stitching out the design on a machine that uses .dst files, digitizing directly in the .dst format will yield the best results. <br> <br>Converting a pre-existing design from .pes to .dst is likely to introduce flaws or changes to the original artwork. Only convert formats when necessary, and be prepared for some inaccuracies in the final converted design. Starting from scratch in the desired format avoids the risks of data loss during conversion.
digitize4life
Through computer-aided manufacturing, embroidery digitizing transforms artwork into a digital file that an embroidery machine can understand, enabling embroiderers to mechanically stitch out bespoke designs on fabric. <br> <br>The history of digitising embroidery began in the 1950s with the development of the first computerised sewing and embroidery machines, which stored basic stitch pattern data on punch cards. Over the following few decades, advances in software and computing power allowed digitizers to create more intricate embroidery designs using specialised digitising programmes. <br> <br>Digitizers could now draw embroidery motifs on a digital tablet or import existing artwork to convert into stitch-files; by the 1990s, most commercial embroidery machines accepted data storage on 3.5"" floppy discs or CDs. Manual punch card systems were replaced by vector and raster graphics editors specifically designed for embroidery. <br> <br>The basic process of digitising embroidery remains the same even today: the digitizer scans an image, builds up an artwork stitch-by-stitch using digitising software, assigns attributes (such as stitch type, density, underlay, and colour changes), and exports the finished design as an embroidery machine file for production. Typically, the artwork is in the form of a vector graphic file, scanned from an original drawing, or created by hand. <br> <br>Embroidery digitising converts an image into thousands of accurate stitch coordinates, making customisation and small production runs possible for embroiderers and crafts. Almost any pattern that can be imagined may be instantly and intricately duplicated on cloth. <br> <br>Advantages of Digital Embroidery <br>Compared to conventional hand embroidery, digitising embroidered designs has several advantages. The following are some of the main ones: <br> <br>Quicker and more effective <br>The digitising process translates embroidery designs into digital files that are readable by machines. This makes it possible to use an embroidery machine to stitch out designs quickly and effectively, even intricate ones with lots of colours and details. Compared to hand embroidery, this process saves a significant amount of time. <br> <br>Capacity to Scale and Duplicate <br>An embroiderer can efficiently reuse designs once they are digitised because they are easily duplicated and resized. For instance, a single digitised logo can be embroidered in various sizes on caps, shirts, jackets, etc. Without digitization, each design would need to be hand embroidered separately, which would take a significant amount of time. <br> <br>Adaptability to Edit and Personalise <br>With digitising software, the embroiderer can alter and modify designs to suit specific requirements. Changes to text, colours, and dimensions can be made, as well as the arrangement or removal of specific design sections. Compared to hand embroidery, where changes require redoing the entire design, digitising offers far more flexibility. <br> <br>When compared to traditional hand stitching techniques, digitising embroidery yields significant time savings, consistency, and customisation capabilities. Embroiderers can achieve various benefits and efficiency by learning how to digitise patterns. <br> <br>Various Embroidery File Types <br>When digitising needlework, a variety of file types are utilised. The primary ones are: <br> <br>The most widely used embroidery file type is.DST, which is compatible with most home and commercial embroidery machines and is utilised by Tajima embroidery machines. DST files may store many colours and contain stitch data. <br> <br>.EXP: Designed by Melco embroidery machines, EXP files have the ability to store appliqué data and may be converted to DST. They also include different colours and thread data. <br> <br>Brother designed the.PES format, which is utilised by their embroidery machines and contains information on colours and stitches. The primary benefit of PES files is their tiny size. <br> <br>JEF files are fully digitised machine embroidery files developed by Janome that allow appliqué features and include stitch and colour data. <br> <br>Husqvarna Viking created the.HUS format, which is proprietary yet has a short file size and condensed stitch instructions that make stitching efficient. <br> <br>.SHV: A Singer-created file with limited editing capabilities that holds embroidery data optimised for their machines. <br> <br>The major digitising software can output files in all the major embroidery formats; DST is the format that is most universally compatible across different machine brands, and EXP is also widely compatible. To ensure full compatibility, designers should choose the format based on the machine brand they will be using for embroidery production. <br> <br>Software Digitization <br>Designers can generate digital embroidered files from artwork using embroidery digitising software. A range of features-rich software solutions are available. <br> <br>Frequently Used Digitising Software <br>The following are a few of the most popular embroidery digitising software applications: <br> <br>With powerful auto-digitizing features and compatibility for numerous file types, Wilcom EmbroideryStudio is a full-featured professional software for digitising, editing, lettering, and more. It is anticipated to start at about $6000. <br> <br>Pulse Ambassador is a mid-range digitising programme that works with the majority of embroidery file types and has an easy-to-use interface. <br> <br>Suitable for amateurs and home-based enterprises, Hatch Embroidery Software provides basic digitising functions along with lettering and editing tools. <br> <br>DecoStudio: Limited technical capabilities compared to higher-end solutions; inexpensive digitising software with easy-to-use design tools. <br> <br>Important Elements <br>Software for digitising needlework has the following primary features: <br> <br>Auto-digitizing to create stitches from artwork <br>accurate pattern and stitch-by-stitch modification <br>Tools for lettering featuring hundreds of typefaces <br>Tools for project management <br>Support for all of the main machine formats, including XXX, PES, and DST. <br>To see the needlework before it is produced, use simulation <br>Design resizing, rotation, and arraying <br>Palette management and colour separation <br>Features like auto-sequencing, appliqué tools, picture stitch embroidery, 3D visualisation, and punching tools for quilting patterns are available in more sophisticated programmes. <br> <br>Cost Range <br>The cost of embroidery digitising software varies greatly; entry-level solutions like DecoStudio start at about $200, and professional tools like Wilcome can cost up to $6000 or more. <br> <br>Although more expensive alternatives offer more functionality and technological capabilities, less expensive software can nevertheless teach beginners the fundamentals of digitising. <br> <br>The Step-by-Step Digitising Process <br>Here is a summary of the steps that are involved in digitising embroidery from artwork to a finished embroiderable file: <br> <br>Getting Ready for Artwork <br>Artwork that can be digitised must be created or obtained first. It must be in a digital format such as a vector file, bitmap, jpeg, or PNG. Ideally, the artwork will be simple, such as a logo, with defined edges and shapes devoid of subtle colour gradients. It must also be sized correctly and contain all the details that will be embroidered. <br> <br>Configuring a File <br>Once the artwork is ready, open a new file in your digitising programme, place the artwork, scale it to the correct size for the embroidery, define the sewing field by establishing boundary guides for the embroidery, and set the stitches to a standard density and other base settings appropriate for your design. <br> <br>Designing Stitch Types <br>It's now time to define the various stitch types. The most popular types are outline, fill, underlay, and satin stitches. Match the right stitch type to the right section of the artwork (use fill stitches for larger areas, or satin stitches for lettering, for example). Optimise the direction and properties of the stitch. <br> <br>Choosing Colours <br>Aim for colour changes only where necessary to contain stitch areas; minimise colour changes for efficiency. Embroidery designs can have multiple colours. Assign a thread colour to each part of the design that requires a colour change. The digitising software will insert colour change stops and arrange the stitch sequence. <br> <br>Examining Design <br>To see how the embroidery will stitch out, run a design simulation. Look for problems with the density, stitch types, or colour changes. Add underlays or tweak stitch angles to improve the digitised file as needed. Zoom in closer to fine-tune details. <br> <br>Exporting Complete Documents <br>Once the finished embroidery files have been tested and refined, export them to an embroidery machine in one of the common file formats (DST, PES, EXP, JEF, or EMB). Most digitizers offer their clients various file formats. <br> <br>You may turn artwork into an excellent embroidery design file by following these essential steps. A good digitising method is essential to excellent outcomes. <br> <br>Some Advice on Digitising Difficult Designs <br>There are techniques you can employ to simplify the process and enhance the outcome when digitising intricate embroidered designs. The following are some pointers for handling challenging areas of digitising: <br> <br>Techniques for Writing Letters <br>Simple block or sans-serif fonts are usually the best options; avoid thin, intricate typefaces that might not digitise adequately. <br>For legibility, the letter height should be at least 5mm; additionally, take into account the thickness of the fabric. <br>Use edge walk underlay to minimise gaps between letters and to add underlay stitches for a smooth edge. <br>For a neat appearance, add trim between letters; it should be thin, measuring between 0.3 and 0.4 mm. <br>For the body of the letters, use a fill stitch; tatami fill or a light satin fill work well for coverage. <br>Don't forget to test sew the pattern to verify letter alignment and spacing. <br>Advice on Digitising Appliques <br>For the applique outline, use a run stitch or triple run, and position the stitching just inside the raw edges. <br>For extra freedom when putting applique pieces, some people choose to use a blanket stitch or zigzag stitch. <br>To indicate where the applique pieces should be placed, add placement lines. <br>Reduce the amount of fabric pieces to make construction simpler. You can blend forms that overlap. <br>For a different look, think about free-standing lace applique; digitise the lace pattern and sew out twice on the soluble stabiliser. <br>Suggestions for Difficult Fabrics <br>Increase density for filling stitches and underlay for stability on heavy materials like denim. <br>Use less underlay and more adaptable fill stitches, such as tattoo fills, for materials like jersey or flexible knits. <br>A water-soluble coating helps keep loops out of the way of stitching when using terry cloth towels. <br>Use lightweight fillings and minimise fill density for lightweight silks and satins to prevent puckering or show through dense underlays. <br>Make any necessary changes to the design file and test sew on a fabric scrap first if you're not sure how a cloth will stitch out. <br>Enhancing Embroidery Patterns <br>Take remove extra nodes, leaving just enough for well-defined shapes and curves; overly digitalized drawings result in bloated files and slow stitch-outs. <br>Reduce fabric holes and jump stitches by utilising tie-offs and trim functions. <br>Select effective stitch lengths and angles in accordance with the design shapes; do not make too many stitch modifications. <br>To improve the pattern, look for any hidden or superfluous stitches and eliminate them. <br>Logical stitch order enhances performance; minimise stops and colour changes with stitch sequencing and colour sorting. <br>It will pay off to take the time to properly digitise, since you'll acquire skills to manage even the most difficult embroidery tasks with practice and expertise digitising a wide range of designs. <br> <br>Typical Errors Made When Digitising Embroidery <br>Three of the most common mistakes that happen when digitising embroidery designs are pull compensation errors, improper stitch density, and colour assignment issues. These mistakes can happen if the digitizer is inexperienced or rushes the process. By being aware of these potential issues, you can address them before they become problems. <br> <br>Errors in Pull Compensation <br>Pull compensation is the process of adjusting embroidery software to take into account the natural pull and distortion of the base material caused by stitches during the sewing process. Digitizers must compensate for this pull and distortion by digitising stitches that are slightly longer or larger than the actual desired design size. If pull compensation is not done correctly, designs will not stitch out as intended. <br> <br>One of the most common digitising errors is inadequate pull compensation, which can be caused by a variety of factors such as lettering or details coming out smaller or condensed than they should be, fine details becoming lost or unclear, borders and outline pulling in too tightly, and more. Pull compensation requires precision and should be customised based on stitch lengths and fabric types. <br> <br>Not Enough Stitch Density <br>The term "stitch density" describes the amount of stitches per inch or centimetre in an embroidery design. A design with the right density will have enough features and not look cheap or thin, whereas a pattern with a high density can overcrowd the fabric and leave unwanted accumulation. <br> <br>Variable density should also be used to avoid abrupt density changes. Digitizers who apply one standard density throughout the design will get subpar results. Instead, they should assign an ideal density for each design element based on content and fabric. For instance, wide fills can have a lower density than fine lettering. <br> <br>Problems with Colour Assignment <br>The majority of embroidery machines are only capable of handling a certain number of thread colours per design, so it is important for the digitizer to assign colours correctly and reduce the amount of transitions and changeovers that must occur during sewing. Incorrect colour assignments can lead to poor registration, needless changeovers, and inefficient production. <br> <br>Mistakes in colour digitization can lead to colours bleeding into each other, too many trims and changeovers, and uneven colour alignment. For multi-color designs, the digitizer should work from light to dark, avoiding needless jumps between disparate colours. Adjacent sections should use distinctly different colours to minimise bleed-through. <br> <br>Costs of Digitising Embroidery <br>The complexity of the pattern, size, number of stitches, and other factors can all have a significant impact on the cost of digitising embroidery. The following is a summary of common pricing and strategies for lowering digitising costs: <br> <br>Average Cost for Each Design <br> <br>$15 to $50 for a simple logo with up to 10,000 stitches <br>Design with 10,000–20,000 stitches and medium complexity: $50–$100 <br>Over 20,000 stitches in a very intricate design; cost between $100 and $250+ <br>Cost is mostly determined by the amount of stitches, as more stitches require more time to digitise. Some designers charge by the stitch, ranging from $0.01 to $0.03, instead of charging a set rate. <br> <br>Variables that Impact Price <br> <br>Additional elements that raise the cost and complexity of designs are as follows: <br> <br>Several colours: A more complex pattern results from more thread modifications. <br>Level of detail and shape complexity: Digitising intricate features or complicated designs takes more work. <br>Design size: More room in the embroidery hoop is required for larger designs. <br>Edit requests: Additional digitising time is needed for any changes or adjustments to a design. <br>Methods for Cutting Expenses <br> <br>Here are some pointers to lower the cost of digitising embroidery: <br> <br>Provide the best quality artwork you can; neater artwork means quicker digitization. <br>Purchase in bulk to receive discounts from the majority of digitizers. <br>Offer a variety of sizes: It will save time to have a design available in three sizes at the outset. <br>Plan to minimise quick turnaround fees and steer clear of rush orders, as these can quadruple the cost. <br>Choose a new or foreign firm first; their rates are frequently substantially lower to draw in business. Examine their portfolio. <br>These pointers will help you save a lot of money on digitising, particularly on complicated or large orders. Choose a reliable digitizer who can expertly convert your artwork to save money without sacrificing quality. <br> <br>Using a Digitizer for Embroidery <br>There are a number of advantages to outsourcing your embroidery digitising for your company. The following are some of the primary benefits of working with a professional digitizer: <br> <br>Access to specific training and experience: Embroidery digitising calls for specialised training and knowledge. An experienced digitizer can save you time and frustration by converting designs accurately and efficiently because they have honed their skills over years of experience in the field. <br> <br>Better quality and consistency: Skilled digitizers produce clean, high-quality embroidery files on a regular basis, which results in fewer errors and better embroidered items overall. They also have an eye for detail. <br> <br>Enhanced production capacity: You can't grow production and take on more orders if you're not able to digitise quickly enough to meet demand unless digitising is your full-time job. Outsourcing gives you that flexibility. <br> <br>Savings: Using a specialised digitizer can save time and increase efficiency, which can reduce labour costs for your company as a whole. <br> <br>Online marketplaces such as Upwork, Fiverr, and Freelancer.com make it simple to find a freelance digitizer to work with; you can see profiles, evaluations, and examples of their work to find qualified candidates. When corresponding with possible digitizers, make sure to ask the following crucial questions: <br> <br>Which embroidery file formats—PES and DST, for example—do you use? <br>How many years have you worked as a professional digitizer? <br>How can precision and quality assurance for designs be guaranteed? <br>How long does it take you to process rush orders or ordinary orders? <br>What is your pricing policy? Do you offer discounts for larger orders placed in bulk? <br>Do you modify pre-made designs or digitise unique artwork? <br>It will save you hassles later on and help you grow your production effectively if you thoroughly vet digitizers up front to make sure you choose someone trustworthy who can produce high-quality, accurate embroidery digitising in a timely manner and understands your business demands. <br> <br>The Digitising of Embroidery's Future <br>With emerging technologies like artificial intelligence (AI) and machine learning ready to revolutionise the embroidery business, the future of digitising embroidery is bright. As embroidery becomes more digitally advanced, we may anticipate sustained rapid development and innovation. <br> <br>Businesses are already experimenting with neural networks and deep learning to simplify and optimise digitising. One exciting development is the use of machine learning algorithms to automate parts of the digitising process. Though digitizers still play a crucial role, AI will help speed up the process and even learn to digitise increasingly complex designs with precision. <br> <br>The market for digital embroidery is expected to expand gradually over the next ten years as more sophisticated machines and better embroidery software enable more personalisation and on-demand production. As a result, small businesses and enthusiasts will be able to afford digital embroidery. <br> <br>Customers today expect and demand hyper-personalized products; with on-site embroidery machines connected to databases of digital designs, businesses can customise clothing, hats, bags, and more in-house on the fly, allowing for fast order turnaround. Even small custom batches become feasible. Digitization also enables new trends in customisation and personalisation. <br> <br>The opportunities for the future are endless: <br>Names, dates, and photographs can be added to patterns using dynamic data-driven embroidery. <br>Utilising mobile apps, embroidery designs may be delivered directly to connected machines. <br>Intelligent machines that self-optimize and acquire new abilities in embroidery. <br>Creative companies, big and small, may expand the worldwide reach of their bespoke creations with the advent of digital embroidery. <br> <br>[a]https%3A%2F%2Fwww.digitize4life.com[/a]
About john heggan's Store
No description provided.
0.0
Customer Reviews
See what others are saying about john heggan's Store. We verify purchases to ensure reviews are genuine.
No reviews yet for this store.