

zoom_in
digitize4life
€0.00
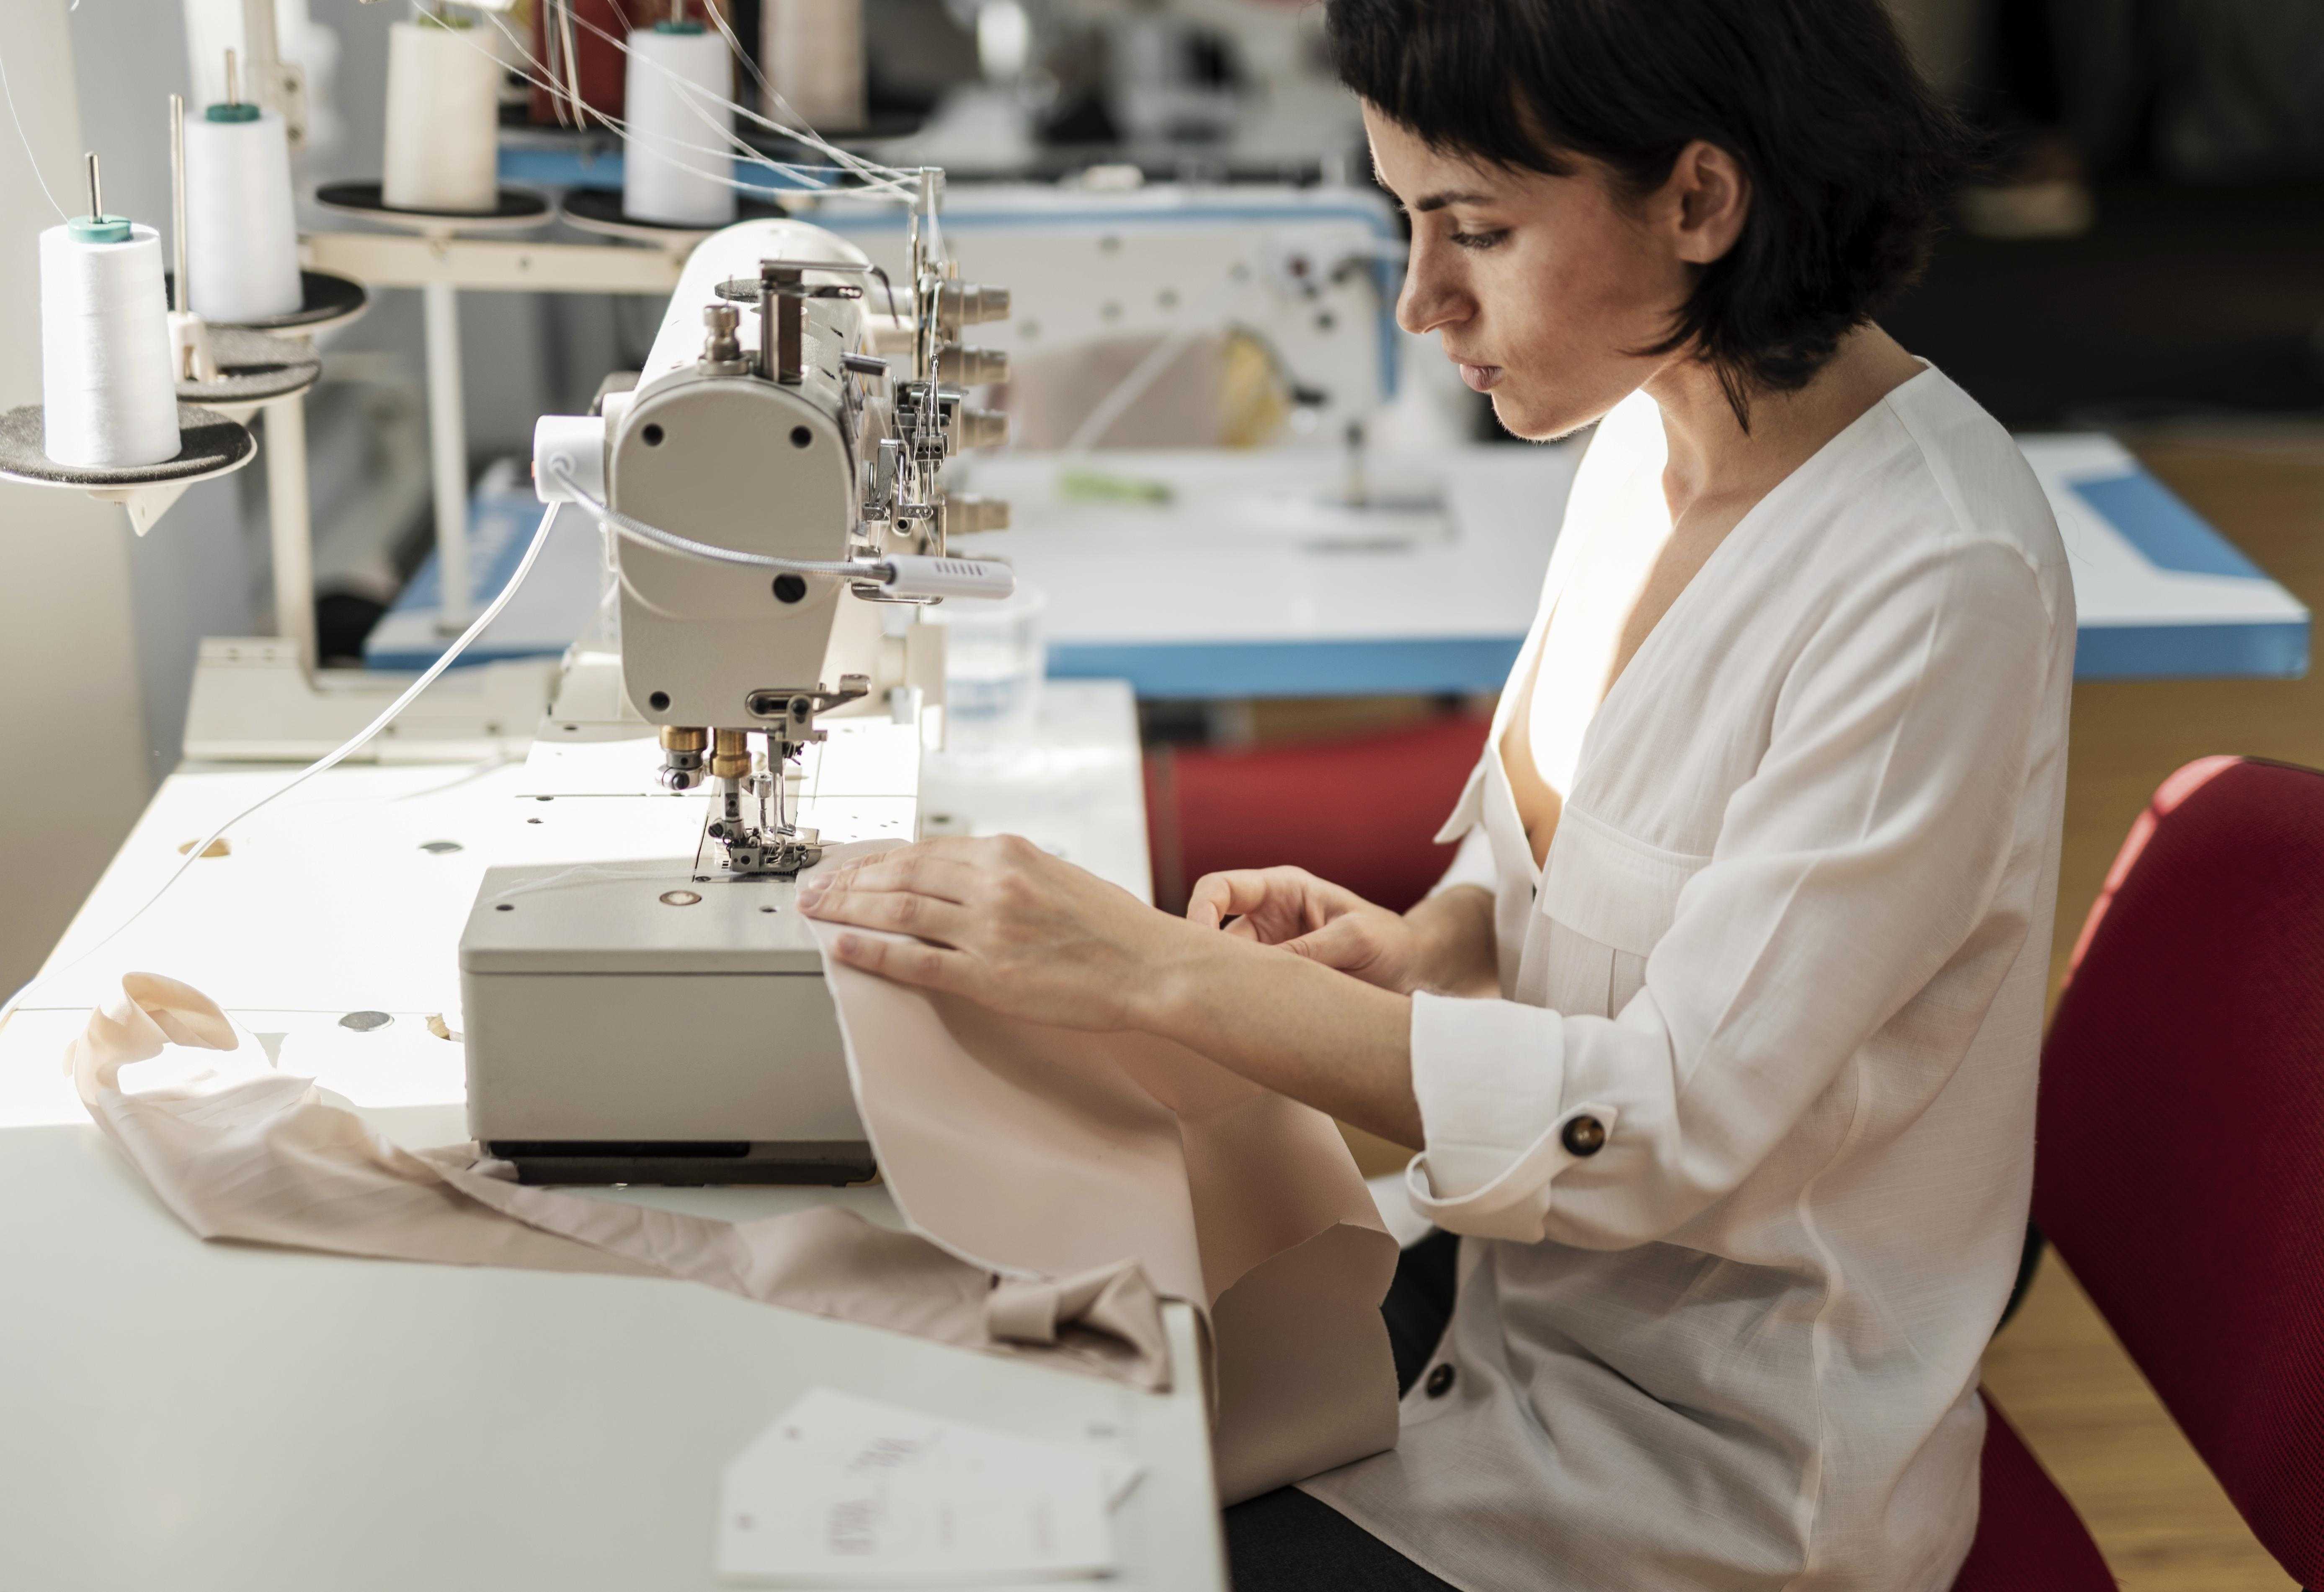
Through computer-aided manufacturing, embroidery digitizing transforms artwork into a digital file that an embroidery machine can understand, enabling embroiderers to mechanically stitch out bespoke designs on fabric.
The history of digitising embroidery began in the 1950s with the development of the first computerised sewing and embroidery machines, which stored basic stitch pattern data on punch cards. Over the following few decades, advances in software and computing power allowed digitizers to create more intricate embroidery designs using specialised digitising programmes.
Digitizers could now draw embroidery motifs on a digital tablet or import existing artwork to convert into stitch-files; by the 1990s, most commercial embroidery machines accepted data storage on 3.5"" floppy discs or CDs. Manual punch card systems were replaced by vector and raster graphics editors specifically designed for embroidery.
The basic process of digitising embroidery remains the same even today: the digitizer scans an image, builds up an artwork stitch-by-stitch using digitising software, assigns attributes (such as stitch type, density, underlay, and colour changes), and exports the finished design as an embroidery machine file for production. Typically, the artwork is in the form of a vector graphic file, scanned from an original drawing, or created by hand.
Embroidery digitising converts an image into thousands of accurate stitch coordinates, making customisation and small production runs possible for embroiderers and crafts. Almost any pattern that can be imagined may be instantly and intricately duplicated on cloth.
Advantages of Digital Embroidery
Compared to conventional hand embroidery, digitising embroidered designs has several advantages. The following are some of the main ones:
Quicker and more effective
The digitising process translates embroidery designs into digital files that are readable by machines. This makes it possible to use an embroidery machine to stitch out designs quickly and effectively, even intricate ones with lots of colours and details. Compared to hand embroidery, this process saves a significant amount of time.
Capacity to Scale and Duplicate
An embroiderer can efficiently reuse designs once they are digitised because they are easily duplicated and resized. For instance, a single digitised logo can be embroidered in various sizes on caps, shirts, jackets, etc. Without digitization, each design would need to be hand embroidered separately, which would take a significant amount of time.
Adaptability to Edit and Personalise
With digitising software, the embroiderer can alter and modify designs to suit specific requirements. Changes to text, colours, and dimensions can be made, as well as the arrangement or removal of specific design sections. Compared to hand embroidery, where changes require redoing the entire design, digitising offers far more flexibility.
When compared to traditional hand stitching techniques, digitising embroidery yields significant time savings, consistency, and customisation capabilities. Embroiderers can achieve various benefits and efficiency by learning how to digitise patterns.
Various Embroidery File Types
When digitising needlework, a variety of file types are utilised. The primary ones are:
The most widely used embroidery file type is.DST, which is compatible with most home and commercial embroidery machines and is utilised by Tajima embroidery machines. DST files may store many colours and contain stitch data.
.EXP: Designed by Melco embroidery machines, EXP files have the ability to store appliqué data and may be converted to DST. They also include different colours and thread data.
Brother designed the.PES format, which is utilised by their embroidery machines and contains information on colours and stitches. The primary benefit of PES files is their tiny size.
JEF files are fully digitised machine embroidery files developed by Janome that allow appliqué features and include stitch and colour data.
Husqvarna Viking created the.HUS format, which is proprietary yet has a short file size and condensed stitch instructions that make stitching efficient.
.SHV: A Singer-created file with limited editing capabilities that holds embroidery data optimised for their machines.
The major digitising software can output files in all the major embroidery formats; DST is the format that is most universally compatible across different machine brands, and EXP is also widely compatible. To ensure full compatibility, designers should choose the format based on the machine brand they will be using for embroidery production.
Software Digitization
Designers can generate digital embroidered files from artwork using embroidery digitising software. A range of features-rich software solutions are available.
Frequently Used Digitising Software
The following are a few of the most popular embroidery digitising software applications:
With powerful auto-digitizing features and compatibility for numerous file types, Wilcom EmbroideryStudio is a full-featured professional software for digitising, editing, lettering, and more. It is anticipated to start at about $6000.
Pulse Ambassador is a mid-range digitising programme that works with the majority of embroidery file types and has an easy-to-use interface.
Suitable for amateurs and home-based enterprises, Hatch Embroidery Software provides basic digitising functions along with lettering and editing tools.
DecoStudio: Limited technical capabilities compared to higher-end solutions; inexpensive digitising software with easy-to-use design tools.
Important Elements
Software for digitising needlework has the following primary features:
Auto-digitizing to create stitches from artwork
accurate pattern and stitch-by-stitch modification
Tools for lettering featuring hundreds of typefaces
Tools for project management
Support for all of the main machine formats, including XXX, PES, and DST.
To see the needlework before it is produced, use simulation
Design resizing, rotation, and arraying
Palette management and colour separation
Features like auto-sequencing, appliqué tools, picture stitch embroidery, 3D visualisation, and punching tools for quilting patterns are available in more sophisticated programmes.
Cost Range
The cost of embroidery digitising software varies greatly; entry-level solutions like DecoStudio start at about $200, and professional tools like Wilcome can cost up to $6000 or more.
Although more expensive alternatives offer more functionality and technological capabilities, less expensive software can nevertheless teach beginners the fundamentals of digitising.
The Step-by-Step Digitising Process
Here is a summary of the steps that are involved in digitising embroidery from artwork to a finished embroiderable file:
Getting Ready for Artwork
Artwork that can be digitised must be created or obtained first. It must be in a digital format such as a vector file, bitmap, jpeg, or PNG. Ideally, the artwork will be simple, such as a logo, with defined edges and shapes devoid of subtle colour gradients. It must also be sized correctly and contain all the details that will be embroidered.
Configuring a File
Once the artwork is ready, open a new file in your digitising programme, place the artwork, scale it to the correct size for the embroidery, define the sewing field by establishing boundary guides for the embroidery, and set the stitches to a standard density and other base settings appropriate for your design.
Designing Stitch Types
It's now time to define the various stitch types. The most popular types are outline, fill, underlay, and satin stitches. Match the right stitch type to the right section of the artwork (use fill stitches for larger areas, or satin stitches for lettering, for example). Optimise the direction and properties of the stitch.
Choosing Colours
Aim for colour changes only where necessary to contain stitch areas; minimise colour changes for efficiency. Embroidery designs can have multiple colours. Assign a thread colour to each part of the design that requires a colour change. The digitising software will insert colour change stops and arrange the stitch sequence.
Examining Design
To see how the embroidery will stitch out, run a design simulation. Look for problems with the density, stitch types, or colour changes. Add underlays or tweak stitch angles to improve the digitised file as needed. Zoom in closer to fine-tune details.
Exporting Complete Documents
Once the finished embroidery files have been tested and refined, export them to an embroidery machine in one of the common file formats (DST, PES, EXP, JEF, or EMB). Most digitizers offer their clients various file formats.
You may turn artwork into an excellent embroidery design file by following these essential steps. A good digitising method is essential to excellent outcomes.
Some Advice on Digitising Difficult Designs
There are techniques you can employ to simplify the process and enhance the outcome when digitising intricate embroidered designs. The following are some pointers for handling challenging areas of digitising:
Techniques for Writing Letters
Simple block or sans-serif fonts are usually the best options; avoid thin, intricate typefaces that might not digitise adequately.
For legibility, the letter height should be at least 5mm; additionally, take into account the thickness of the fabric.
Use edge walk underlay to minimise gaps between letters and to add underlay stitches for a smooth edge.
For a neat appearance, add trim between letters; it should be thin, measuring between 0.3 and 0.4 mm.
For the body of the letters, use a fill stitch; tatami fill or a light satin fill work well for coverage.
Don't forget to test sew the pattern to verify letter alignment and spacing.
Advice on Digitising Appliques
For the applique outline, use a run stitch or triple run, and position the stitching just inside the raw edges.
For extra freedom when putting applique pieces, some people choose to use a blanket stitch or zigzag stitch.
To indicate where the applique pieces should be placed, add placement lines.
Reduce the amount of fabric pieces to make construction simpler. You can blend forms that overlap.
For a different look, think about free-standing lace applique; digitise the lace pattern and sew out twice on the soluble stabiliser.
Suggestions for Difficult Fabrics
Increase density for filling stitches and underlay for stability on heavy materials like denim.
Use less underlay and more adaptable fill stitches, such as tattoo fills, for materials like jersey or flexible knits.
A water-soluble coating helps keep loops out of the way of stitching when using terry cloth towels.
Use lightweight fillings and minimise fill density for lightweight silks and satins to prevent puckering or show through dense underlays.
Make any necessary changes to the design file and test sew on a fabric scrap first if you're not sure how a cloth will stitch out.
Enhancing Embroidery Patterns
Take remove extra nodes, leaving just enough for well-defined shapes and curves; overly digitalized drawings result in bloated files and slow stitch-outs.
Reduce fabric holes and jump stitches by utilising tie-offs and trim functions.
Select effective stitch lengths and angles in accordance with the design shapes; do not make too many stitch modifications.
To improve the pattern, look for any hidden or superfluous stitches and eliminate them.
Logical stitch order enhances performance; minimise stops and colour changes with stitch sequencing and colour sorting.
It will pay off to take the time to properly digitise, since you'll acquire skills to manage even the most difficult embroidery tasks with practice and expertise digitising a wide range of designs.
Typical Errors Made When Digitising Embroidery
Three of the most common mistakes that happen when digitising embroidery designs are pull compensation errors, improper stitch density, and colour assignment issues. These mistakes can happen if the digitizer is inexperienced or rushes the process. By being aware of these potential issues, you can address them before they become problems.
Errors in Pull Compensation
Pull compensation is the process of adjusting embroidery software to take into account the natural pull and distortion of the base material caused by stitches during the sewing process. Digitizers must compensate for this pull and distortion by digitising stitches that are slightly longer or larger than the actual desired design size. If pull compensation is not done correctly, designs will not stitch out as intended.
One of the most common digitising errors is inadequate pull compensation, which can be caused by a variety of factors such as lettering or details coming out smaller or condensed than they should be, fine details becoming lost or unclear, borders and outline pulling in too tightly, and more. Pull compensation requires precision and should be customised based on stitch lengths and fabric types.
Not Enough Stitch Density
The term "stitch density" describes the amount of stitches per inch or centimetre in an embroidery design. A design with the right density will have enough features and not look cheap or thin, whereas a pattern with a high density can overcrowd the fabric and leave unwanted accumulation.
Variable density should also be used to avoid abrupt density changes. Digitizers who apply one standard density throughout the design will get subpar results. Instead, they should assign an ideal density for each design element based on content and fabric. For instance, wide fills can have a lower density than fine lettering.
Problems with Colour Assignment
The majority of embroidery machines are only capable of handling a certain number of thread colours per design, so it is important for the digitizer to assign colours correctly and reduce the amount of transitions and changeovers that must occur during sewing. Incorrect colour assignments can lead to poor registration, needless changeovers, and inefficient production.
Mistakes in colour digitization can lead to colours bleeding into each other, too many trims and changeovers, and uneven colour alignment. For multi-color designs, the digitizer should work from light to dark, avoiding needless jumps between disparate colours. Adjacent sections should use distinctly different colours to minimise bleed-through.
Costs of Digitising Embroidery
The complexity of the pattern, size, number of stitches, and other factors can all have a significant impact on the cost of digitising embroidery. The following is a summary of common pricing and strategies for lowering digitising costs:
Average Cost for Each Design
$15 to $50 for a simple logo with up to 10,000 stitches
Design with 10,000–20,000 stitches and medium complexity: $50–$100
Over 20,000 stitches in a very intricate design; cost between $100 and $250+
Cost is mostly determined by the amount of stitches, as more stitches require more time to digitise. Some designers charge by the stitch, ranging from $0.01 to $0.03, instead of charging a set rate.
Variables that Impact Price
Additional elements that raise the cost and complexity of designs are as follows:
Several colours: A more complex pattern results from more thread modifications.
Level of detail and shape complexity: Digitising intricate features or complicated designs takes more work.
Design size: More room in the embroidery hoop is required for larger designs.
Edit requests: Additional digitising time is needed for any changes or adjustments to a design.
Methods for Cutting Expenses
Here are some pointers to lower the cost of digitising embroidery:
Provide the best quality artwork you can; neater artwork means quicker digitization.
Purchase in bulk to receive discounts from the majority of digitizers.
Offer a variety of sizes: It will save time to have a design available in three sizes at the outset.
Plan to minimise quick turnaround fees and steer clear of rush orders, as these can quadruple the cost.
Choose a new or foreign firm first; their rates are frequently substantially lower to draw in business. Examine their portfolio.
These pointers will help you save a lot of money on digitising, particularly on complicated or large orders. Choose a reliable digitizer who can expertly convert your artwork to save money without sacrificing quality.
Using a Digitizer for Embroidery
There are a number of advantages to outsourcing your embroidery digitising for your company. The following are some of the primary benefits of working with a professional digitizer:
Access to specific training and experience: Embroidery digitising calls for specialised training and knowledge. An experienced digitizer can save you time and frustration by converting designs accurately and efficiently because they have honed their skills over years of experience in the field.
Better quality and consistency: Skilled digitizers produce clean, high-quality embroidery files on a regular basis, which results in fewer errors and better embroidered items overall. They also have an eye for detail.
Enhanced production capacity: You can't grow production and take on more orders if you're not able to digitise quickly enough to meet demand unless digitising is your full-time job. Outsourcing gives you that flexibility.
Savings: Using a specialised digitizer can save time and increase efficiency, which can reduce labour costs for your company as a whole.
Online marketplaces such as Upwork, Fiverr, and Freelancer.com make it simple to find a freelance digitizer to work with; you can see profiles, evaluations, and examples of their work to find qualified candidates. When corresponding with possible digitizers, make sure to ask the following crucial questions:
Which embroidery file formats—PES and DST, for example—do you use?
How many years have you worked as a professional digitizer?
How can precision and quality assurance for designs be guaranteed?
How long does it take you to process rush orders or ordinary orders?
What is your pricing policy? Do you offer discounts for larger orders placed in bulk?
Do you modify pre-made designs or digitise unique artwork?
It will save you hassles later on and help you grow your production effectively if you thoroughly vet digitizers up front to make sure you choose someone trustworthy who can produce high-quality, accurate embroidery digitising in a timely manner and understands your business demands.
The Digitising of Embroidery's Future
With emerging technologies like artificial intelligence (AI) and machine learning ready to revolutionise the embroidery business, the future of digitising embroidery is bright. As embroidery becomes more digitally advanced, we may anticipate sustained rapid development and innovation.
Businesses are already experimenting with neural networks and deep learning to simplify and optimise digitising. One exciting development is the use of machine learning algorithms to automate parts of the digitising process. Though digitizers still play a crucial role, AI will help speed up the process and even learn to digitise increasingly complex designs with precision.
The market for digital embroidery is expected to expand gradually over the next ten years as more sophisticated machines and better embroidery software enable more personalisation and on-demand production. As a result, small businesses and enthusiasts will be able to afford digital embroidery.
Customers today expect and demand hyper-personalized products; with on-site embroidery machines connected to databases of digital designs, businesses can customise clothing, hats, bags, and more in-house on the fly, allowing for fast order turnaround. Even small custom batches become feasible. Digitization also enables new trends in customisation and personalisation.
The opportunities for the future are endless:
Names, dates, and photographs can be added to patterns using dynamic data-driven embroidery.
Utilising mobile apps, embroidery designs may be delivered directly to connected machines.
Intelligent machines that self-optimize and acquire new abilities in embroidery.
Creative companies, big and small, may expand the worldwide reach of their bespoke creations with the advent of digital embroidery.
https://www.digitize4life.com ↗
The history of digitising embroidery began in the 1950s with the development of the first computerised sewing and embroidery machines, which stored basic stitch pattern data on punch cards. Over the following few decades, advances in software and computing power allowed digitizers to create more intricate embroidery designs using specialised digitising programmes.
Digitizers could now draw embroidery motifs on a digital tablet or import existing artwork to convert into stitch-files; by the 1990s, most commercial embroidery machines accepted data storage on 3.5"" floppy discs or CDs. Manual punch card systems were replaced by vector and raster graphics editors specifically designed for embroidery.
The basic process of digitising embroidery remains the same even today: the digitizer scans an image, builds up an artwork stitch-by-stitch using digitising software, assigns attributes (such as stitch type, density, underlay, and colour changes), and exports the finished design as an embroidery machine file for production. Typically, the artwork is in the form of a vector graphic file, scanned from an original drawing, or created by hand.
Embroidery digitising converts an image into thousands of accurate stitch coordinates, making customisation and small production runs possible for embroiderers and crafts. Almost any pattern that can be imagined may be instantly and intricately duplicated on cloth.
Advantages of Digital Embroidery
Compared to conventional hand embroidery, digitising embroidered designs has several advantages. The following are some of the main ones:
Quicker and more effective
The digitising process translates embroidery designs into digital files that are readable by machines. This makes it possible to use an embroidery machine to stitch out designs quickly and effectively, even intricate ones with lots of colours and details. Compared to hand embroidery, this process saves a significant amount of time.
Capacity to Scale and Duplicate
An embroiderer can efficiently reuse designs once they are digitised because they are easily duplicated and resized. For instance, a single digitised logo can be embroidered in various sizes on caps, shirts, jackets, etc. Without digitization, each design would need to be hand embroidered separately, which would take a significant amount of time.
Adaptability to Edit and Personalise
With digitising software, the embroiderer can alter and modify designs to suit specific requirements. Changes to text, colours, and dimensions can be made, as well as the arrangement or removal of specific design sections. Compared to hand embroidery, where changes require redoing the entire design, digitising offers far more flexibility.
When compared to traditional hand stitching techniques, digitising embroidery yields significant time savings, consistency, and customisation capabilities. Embroiderers can achieve various benefits and efficiency by learning how to digitise patterns.
Various Embroidery File Types
When digitising needlework, a variety of file types are utilised. The primary ones are:
The most widely used embroidery file type is.DST, which is compatible with most home and commercial embroidery machines and is utilised by Tajima embroidery machines. DST files may store many colours and contain stitch data.
.EXP: Designed by Melco embroidery machines, EXP files have the ability to store appliqué data and may be converted to DST. They also include different colours and thread data.
Brother designed the.PES format, which is utilised by their embroidery machines and contains information on colours and stitches. The primary benefit of PES files is their tiny size.
JEF files are fully digitised machine embroidery files developed by Janome that allow appliqué features and include stitch and colour data.
Husqvarna Viking created the.HUS format, which is proprietary yet has a short file size and condensed stitch instructions that make stitching efficient.
.SHV: A Singer-created file with limited editing capabilities that holds embroidery data optimised for their machines.
The major digitising software can output files in all the major embroidery formats; DST is the format that is most universally compatible across different machine brands, and EXP is also widely compatible. To ensure full compatibility, designers should choose the format based on the machine brand they will be using for embroidery production.
Software Digitization
Designers can generate digital embroidered files from artwork using embroidery digitising software. A range of features-rich software solutions are available.
Frequently Used Digitising Software
The following are a few of the most popular embroidery digitising software applications:
With powerful auto-digitizing features and compatibility for numerous file types, Wilcom EmbroideryStudio is a full-featured professional software for digitising, editing, lettering, and more. It is anticipated to start at about $6000.
Pulse Ambassador is a mid-range digitising programme that works with the majority of embroidery file types and has an easy-to-use interface.
Suitable for amateurs and home-based enterprises, Hatch Embroidery Software provides basic digitising functions along with lettering and editing tools.
DecoStudio: Limited technical capabilities compared to higher-end solutions; inexpensive digitising software with easy-to-use design tools.
Important Elements
Software for digitising needlework has the following primary features:
Auto-digitizing to create stitches from artwork
accurate pattern and stitch-by-stitch modification
Tools for lettering featuring hundreds of typefaces
Tools for project management
Support for all of the main machine formats, including XXX, PES, and DST.
To see the needlework before it is produced, use simulation
Design resizing, rotation, and arraying
Palette management and colour separation
Features like auto-sequencing, appliqué tools, picture stitch embroidery, 3D visualisation, and punching tools for quilting patterns are available in more sophisticated programmes.
Cost Range
The cost of embroidery digitising software varies greatly; entry-level solutions like DecoStudio start at about $200, and professional tools like Wilcome can cost up to $6000 or more.
Although more expensive alternatives offer more functionality and technological capabilities, less expensive software can nevertheless teach beginners the fundamentals of digitising.
The Step-by-Step Digitising Process
Here is a summary of the steps that are involved in digitising embroidery from artwork to a finished embroiderable file:
Getting Ready for Artwork
Artwork that can be digitised must be created or obtained first. It must be in a digital format such as a vector file, bitmap, jpeg, or PNG. Ideally, the artwork will be simple, such as a logo, with defined edges and shapes devoid of subtle colour gradients. It must also be sized correctly and contain all the details that will be embroidered.
Configuring a File
Once the artwork is ready, open a new file in your digitising programme, place the artwork, scale it to the correct size for the embroidery, define the sewing field by establishing boundary guides for the embroidery, and set the stitches to a standard density and other base settings appropriate for your design.
Designing Stitch Types
It's now time to define the various stitch types. The most popular types are outline, fill, underlay, and satin stitches. Match the right stitch type to the right section of the artwork (use fill stitches for larger areas, or satin stitches for lettering, for example). Optimise the direction and properties of the stitch.
Choosing Colours
Aim for colour changes only where necessary to contain stitch areas; minimise colour changes for efficiency. Embroidery designs can have multiple colours. Assign a thread colour to each part of the design that requires a colour change. The digitising software will insert colour change stops and arrange the stitch sequence.
Examining Design
To see how the embroidery will stitch out, run a design simulation. Look for problems with the density, stitch types, or colour changes. Add underlays or tweak stitch angles to improve the digitised file as needed. Zoom in closer to fine-tune details.
Exporting Complete Documents
Once the finished embroidery files have been tested and refined, export them to an embroidery machine in one of the common file formats (DST, PES, EXP, JEF, or EMB). Most digitizers offer their clients various file formats.
You may turn artwork into an excellent embroidery design file by following these essential steps. A good digitising method is essential to excellent outcomes.
Some Advice on Digitising Difficult Designs
There are techniques you can employ to simplify the process and enhance the outcome when digitising intricate embroidered designs. The following are some pointers for handling challenging areas of digitising:
Techniques for Writing Letters
Simple block or sans-serif fonts are usually the best options; avoid thin, intricate typefaces that might not digitise adequately.
For legibility, the letter height should be at least 5mm; additionally, take into account the thickness of the fabric.
Use edge walk underlay to minimise gaps between letters and to add underlay stitches for a smooth edge.
For a neat appearance, add trim between letters; it should be thin, measuring between 0.3 and 0.4 mm.
For the body of the letters, use a fill stitch; tatami fill or a light satin fill work well for coverage.
Don't forget to test sew the pattern to verify letter alignment and spacing.
Advice on Digitising Appliques
For the applique outline, use a run stitch or triple run, and position the stitching just inside the raw edges.
For extra freedom when putting applique pieces, some people choose to use a blanket stitch or zigzag stitch.
To indicate where the applique pieces should be placed, add placement lines.
Reduce the amount of fabric pieces to make construction simpler. You can blend forms that overlap.
For a different look, think about free-standing lace applique; digitise the lace pattern and sew out twice on the soluble stabiliser.
Suggestions for Difficult Fabrics
Increase density for filling stitches and underlay for stability on heavy materials like denim.
Use less underlay and more adaptable fill stitches, such as tattoo fills, for materials like jersey or flexible knits.
A water-soluble coating helps keep loops out of the way of stitching when using terry cloth towels.
Use lightweight fillings and minimise fill density for lightweight silks and satins to prevent puckering or show through dense underlays.
Make any necessary changes to the design file and test sew on a fabric scrap first if you're not sure how a cloth will stitch out.
Enhancing Embroidery Patterns
Take remove extra nodes, leaving just enough for well-defined shapes and curves; overly digitalized drawings result in bloated files and slow stitch-outs.
Reduce fabric holes and jump stitches by utilising tie-offs and trim functions.
Select effective stitch lengths and angles in accordance with the design shapes; do not make too many stitch modifications.
To improve the pattern, look for any hidden or superfluous stitches and eliminate them.
Logical stitch order enhances performance; minimise stops and colour changes with stitch sequencing and colour sorting.
It will pay off to take the time to properly digitise, since you'll acquire skills to manage even the most difficult embroidery tasks with practice and expertise digitising a wide range of designs.
Typical Errors Made When Digitising Embroidery
Three of the most common mistakes that happen when digitising embroidery designs are pull compensation errors, improper stitch density, and colour assignment issues. These mistakes can happen if the digitizer is inexperienced or rushes the process. By being aware of these potential issues, you can address them before they become problems.
Errors in Pull Compensation
Pull compensation is the process of adjusting embroidery software to take into account the natural pull and distortion of the base material caused by stitches during the sewing process. Digitizers must compensate for this pull and distortion by digitising stitches that are slightly longer or larger than the actual desired design size. If pull compensation is not done correctly, designs will not stitch out as intended.
One of the most common digitising errors is inadequate pull compensation, which can be caused by a variety of factors such as lettering or details coming out smaller or condensed than they should be, fine details becoming lost or unclear, borders and outline pulling in too tightly, and more. Pull compensation requires precision and should be customised based on stitch lengths and fabric types.
Not Enough Stitch Density
The term "stitch density" describes the amount of stitches per inch or centimetre in an embroidery design. A design with the right density will have enough features and not look cheap or thin, whereas a pattern with a high density can overcrowd the fabric and leave unwanted accumulation.
Variable density should also be used to avoid abrupt density changes. Digitizers who apply one standard density throughout the design will get subpar results. Instead, they should assign an ideal density for each design element based on content and fabric. For instance, wide fills can have a lower density than fine lettering.
Problems with Colour Assignment
The majority of embroidery machines are only capable of handling a certain number of thread colours per design, so it is important for the digitizer to assign colours correctly and reduce the amount of transitions and changeovers that must occur during sewing. Incorrect colour assignments can lead to poor registration, needless changeovers, and inefficient production.
Mistakes in colour digitization can lead to colours bleeding into each other, too many trims and changeovers, and uneven colour alignment. For multi-color designs, the digitizer should work from light to dark, avoiding needless jumps between disparate colours. Adjacent sections should use distinctly different colours to minimise bleed-through.
Costs of Digitising Embroidery
The complexity of the pattern, size, number of stitches, and other factors can all have a significant impact on the cost of digitising embroidery. The following is a summary of common pricing and strategies for lowering digitising costs:
Average Cost for Each Design
$15 to $50 for a simple logo with up to 10,000 stitches
Design with 10,000–20,000 stitches and medium complexity: $50–$100
Over 20,000 stitches in a very intricate design; cost between $100 and $250+
Cost is mostly determined by the amount of stitches, as more stitches require more time to digitise. Some designers charge by the stitch, ranging from $0.01 to $0.03, instead of charging a set rate.
Variables that Impact Price
Additional elements that raise the cost and complexity of designs are as follows:
Several colours: A more complex pattern results from more thread modifications.
Level of detail and shape complexity: Digitising intricate features or complicated designs takes more work.
Design size: More room in the embroidery hoop is required for larger designs.
Edit requests: Additional digitising time is needed for any changes or adjustments to a design.
Methods for Cutting Expenses
Here are some pointers to lower the cost of digitising embroidery:
Provide the best quality artwork you can; neater artwork means quicker digitization.
Purchase in bulk to receive discounts from the majority of digitizers.
Offer a variety of sizes: It will save time to have a design available in three sizes at the outset.
Plan to minimise quick turnaround fees and steer clear of rush orders, as these can quadruple the cost.
Choose a new or foreign firm first; their rates are frequently substantially lower to draw in business. Examine their portfolio.
These pointers will help you save a lot of money on digitising, particularly on complicated or large orders. Choose a reliable digitizer who can expertly convert your artwork to save money without sacrificing quality.
Using a Digitizer for Embroidery
There are a number of advantages to outsourcing your embroidery digitising for your company. The following are some of the primary benefits of working with a professional digitizer:
Access to specific training and experience: Embroidery digitising calls for specialised training and knowledge. An experienced digitizer can save you time and frustration by converting designs accurately and efficiently because they have honed their skills over years of experience in the field.
Better quality and consistency: Skilled digitizers produce clean, high-quality embroidery files on a regular basis, which results in fewer errors and better embroidered items overall. They also have an eye for detail.
Enhanced production capacity: You can't grow production and take on more orders if you're not able to digitise quickly enough to meet demand unless digitising is your full-time job. Outsourcing gives you that flexibility.
Savings: Using a specialised digitizer can save time and increase efficiency, which can reduce labour costs for your company as a whole.
Online marketplaces such as Upwork, Fiverr, and Freelancer.com make it simple to find a freelance digitizer to work with; you can see profiles, evaluations, and examples of their work to find qualified candidates. When corresponding with possible digitizers, make sure to ask the following crucial questions:
Which embroidery file formats—PES and DST, for example—do you use?
How many years have you worked as a professional digitizer?
How can precision and quality assurance for designs be guaranteed?
How long does it take you to process rush orders or ordinary orders?
What is your pricing policy? Do you offer discounts for larger orders placed in bulk?
Do you modify pre-made designs or digitise unique artwork?
It will save you hassles later on and help you grow your production effectively if you thoroughly vet digitizers up front to make sure you choose someone trustworthy who can produce high-quality, accurate embroidery digitising in a timely manner and understands your business demands.
The Digitising of Embroidery's Future
With emerging technologies like artificial intelligence (AI) and machine learning ready to revolutionise the embroidery business, the future of digitising embroidery is bright. As embroidery becomes more digitally advanced, we may anticipate sustained rapid development and innovation.
Businesses are already experimenting with neural networks and deep learning to simplify and optimise digitising. One exciting development is the use of machine learning algorithms to automate parts of the digitising process. Though digitizers still play a crucial role, AI will help speed up the process and even learn to digitise increasingly complex designs with precision.
The market for digital embroidery is expected to expand gradually over the next ten years as more sophisticated machines and better embroidery software enable more personalisation and on-demand production. As a result, small businesses and enthusiasts will be able to afford digital embroidery.
Customers today expect and demand hyper-personalized products; with on-site embroidery machines connected to databases of digital designs, businesses can customise clothing, hats, bags, and more in-house on the fly, allowing for fast order turnaround. Even small custom batches become feasible. Digitization also enables new trends in customisation and personalisation.
The opportunities for the future are endless:
Names, dates, and photographs can be added to patterns using dynamic data-driven embroidery.
Utilising mobile apps, embroidery designs may be delivered directly to connected machines.
Intelligent machines that self-optimize and acquire new abilities in embroidery.
Creative companies, big and small, may expand the worldwide reach of their bespoke creations with the advent of digital embroidery.
https://www.digitize4life.com ↗
You might also like

Discount London theatre tickets
star
star
star
star
star
4.0/5
$22.00
Dell Genuine MS111-P USB Optical Mouse 3 Button Wheel MICE 0X9DCG Original New
star
star
star
star
star
4.0/5
$8.79
AmazonBasics Compact Ergonomic Wireless PC Mouse with Fast Scrolling - Blue
star
star
star
star
star
4.0/5
$15.99

Best exhibition stand builder for SMM Hamburg 2024
star
star
star
star
star
4.0/5
$0.00